Installing and setting up XKeen on a Keenetic router
1. Preparing the USB drive
To run XKeen on a Keenetic router, you need a USB drive formatted with the Ext4 file system. It will store all packages and configs.
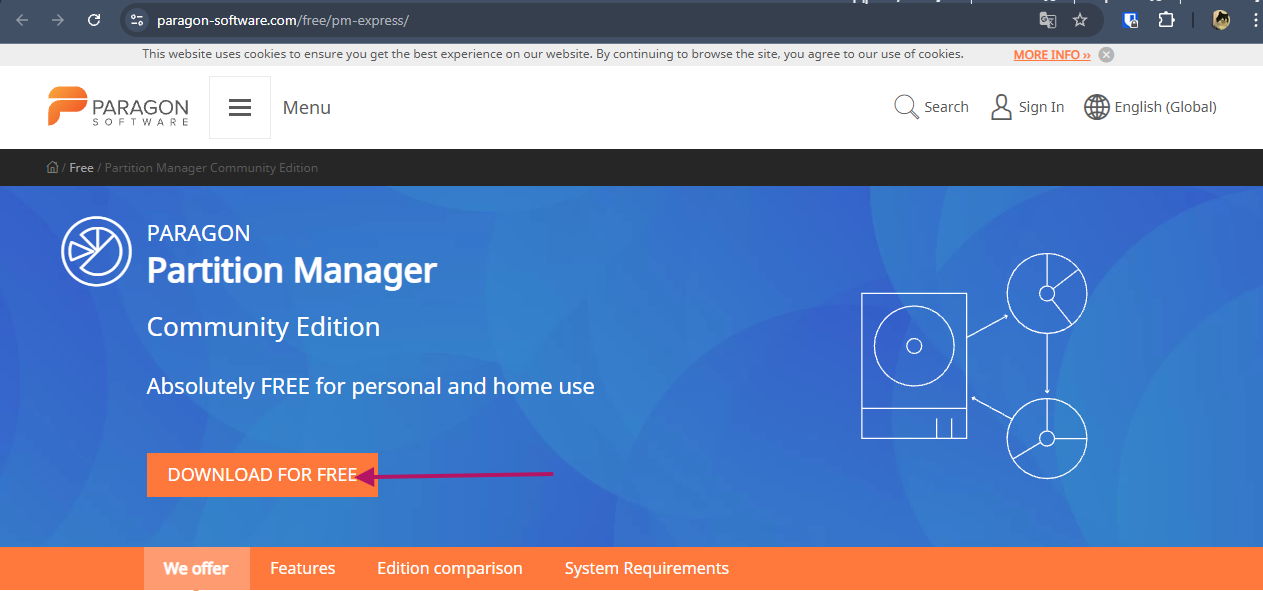
1.1. Download Paragon Partition Manager
Download the free version of Paragon Partition Manager 18 and install it.
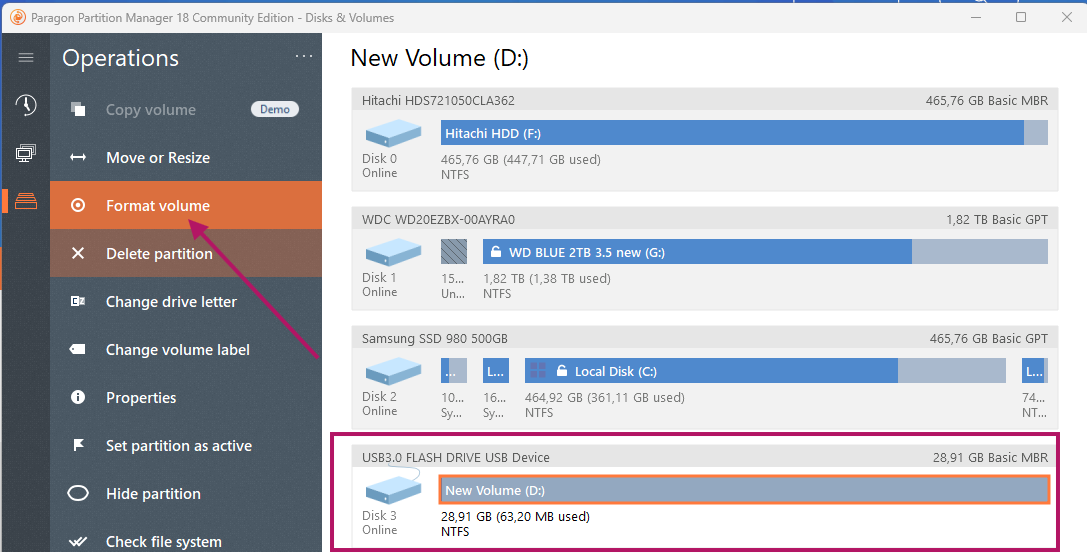
1.2. Format the drive in Ext4
Open Paragon Partition Manager, select your USB drive, and format it with the Ext4 file system.
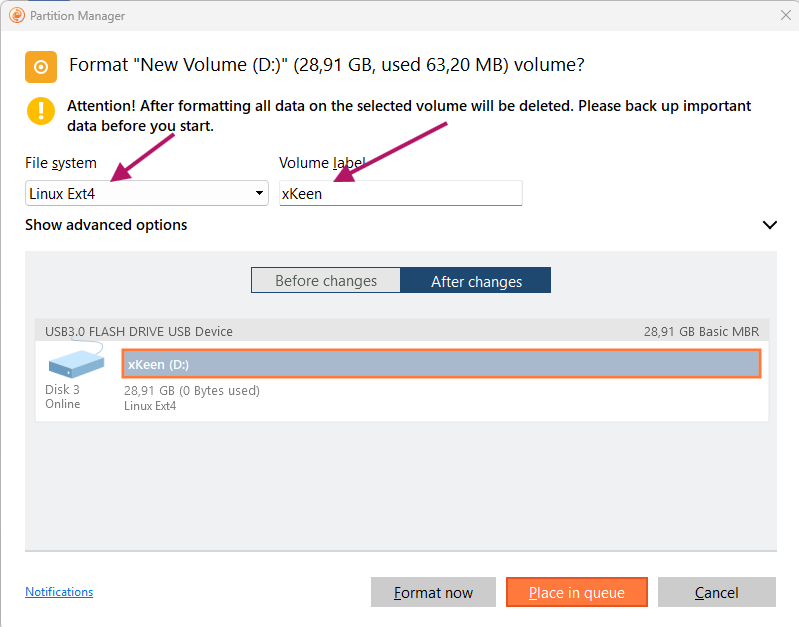
At the end, click Format now.
1.3. Connect the drive to the router
Insert the formatted USB drive into the USB port of your Keenetic router.
2. Installing firmware components
In the router's web interface, install the following components (OPKG guide). The main and required component is "Open packages support":
- ✅ USB interface
- ✅ Ext file system
- ✅ File and printer sharing over SMB
- ✅ Open packages support
- ✅ DNS-over-TLS proxy server
- ✅ DNS-over-HTTPS proxy server
- ✅ IPv6 protocol
- ✅ Netfilter subsystem kernel modules
- ❌ SSH server
Important: Before installing Entware, make sure the "SSH server" Keenetic firmware component is NOT installed. If it is installed — remove it, since Entware uses its own SSH server.
3. Installing Entware
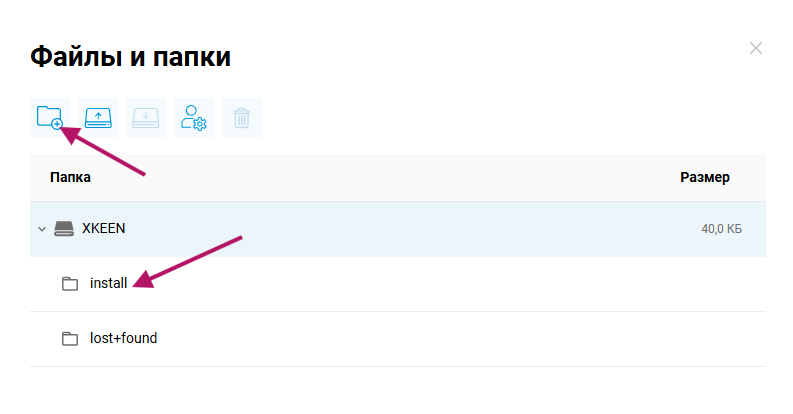
3.1. Create the install folder on the drive
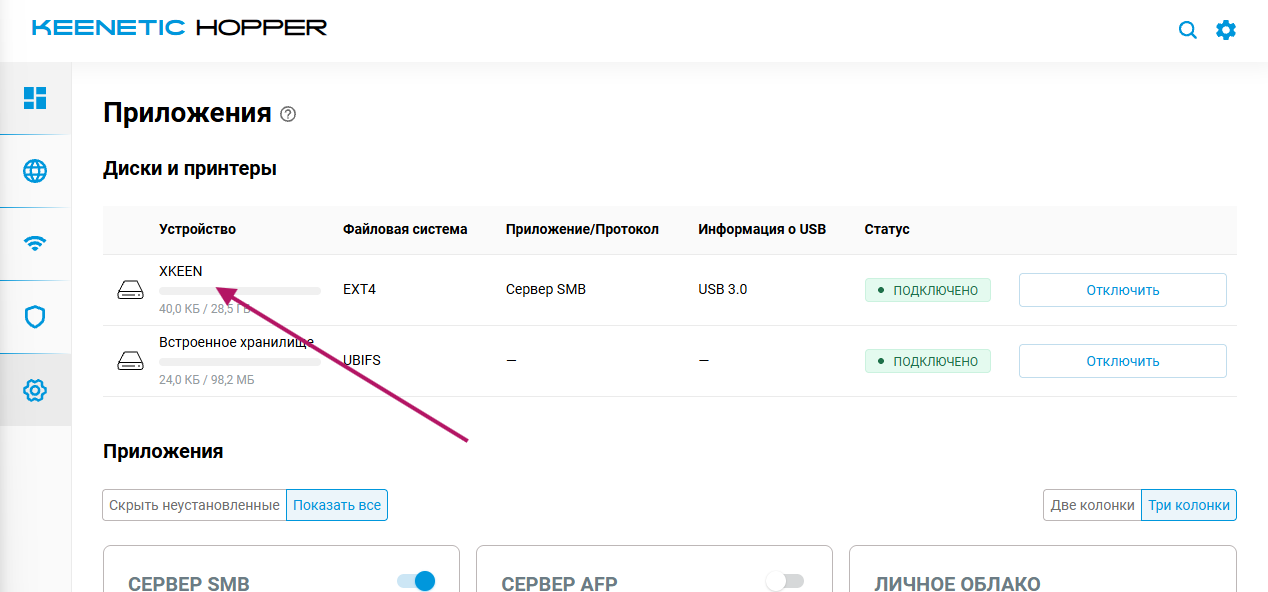
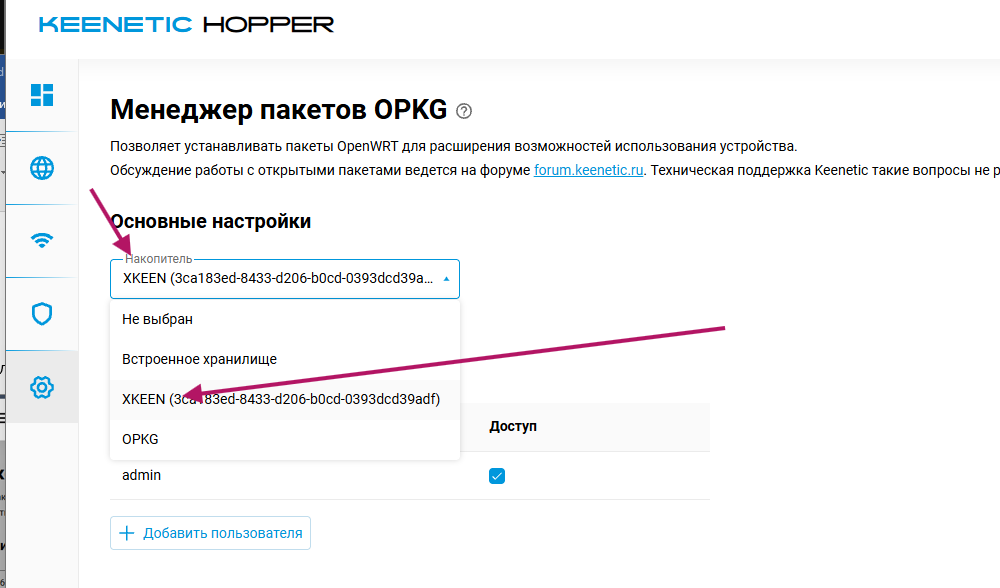
In the router's web interface, go to the file manager. Select your drive (it may be labeled differently).
Create the install folder on the drive.
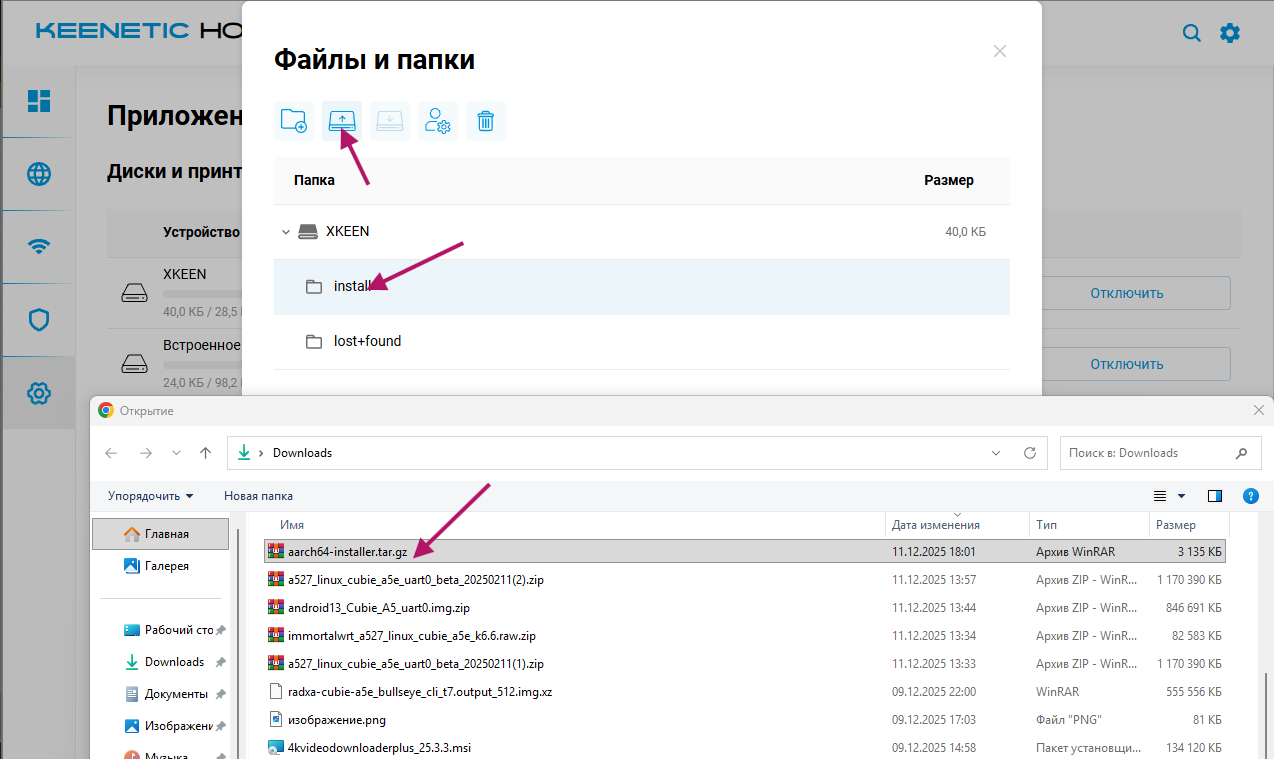
3.2. Download the installer archive
You need to put a file in this folder that matches your specific router model.
Architecture reference:
mipsel — for models 4G (KN-1212), Omni (KN-1410), Extra (KN-1710/1711/1713), Giga (KN-1010/1011), Ultra (KN-1810), Viva (KN-1910/1912/1913), Giant (KN-2610), Hero 4G (KN-2310/2311), Hopper (KN-3810) and Zyxel Keenetic II / III, Extra, Extra II, Giga II / III, Omni, Omni II, Viva, Ultra, Ultra II: → mipsel-installer.tar.gz
mips — for models Ultra SE (KN-2510), Giga SE (KN-2410), DSL (KN-2010), Skipper DSL (KN-2112), Duo (KN-2110), Hopper DSL (KN-3610) and Zyxel Keenetic DSL, LTE, VOX: → mips-installer.tar.gz
aarch64 — for models Peak (KN-2710), Ultra (KN-1811), Giga (KN-1012), Hopper (KN-3811), Hopper SE (KN-3812): → aarch64-installer.tar.gz
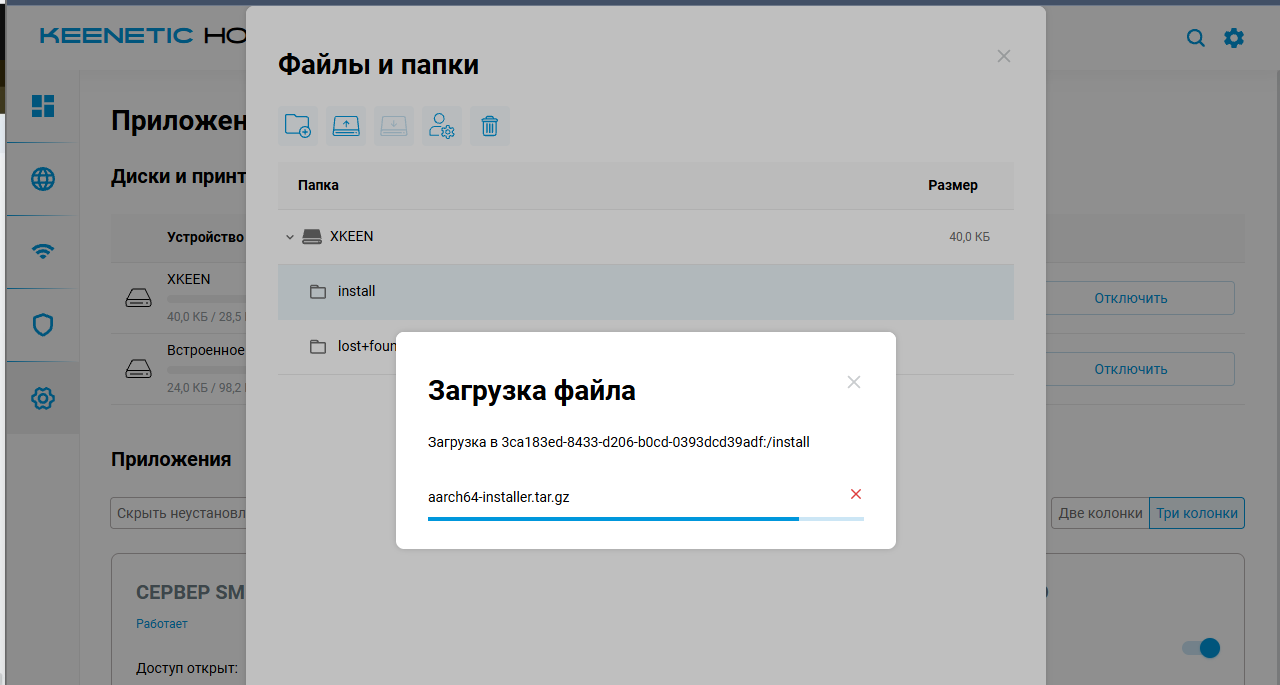
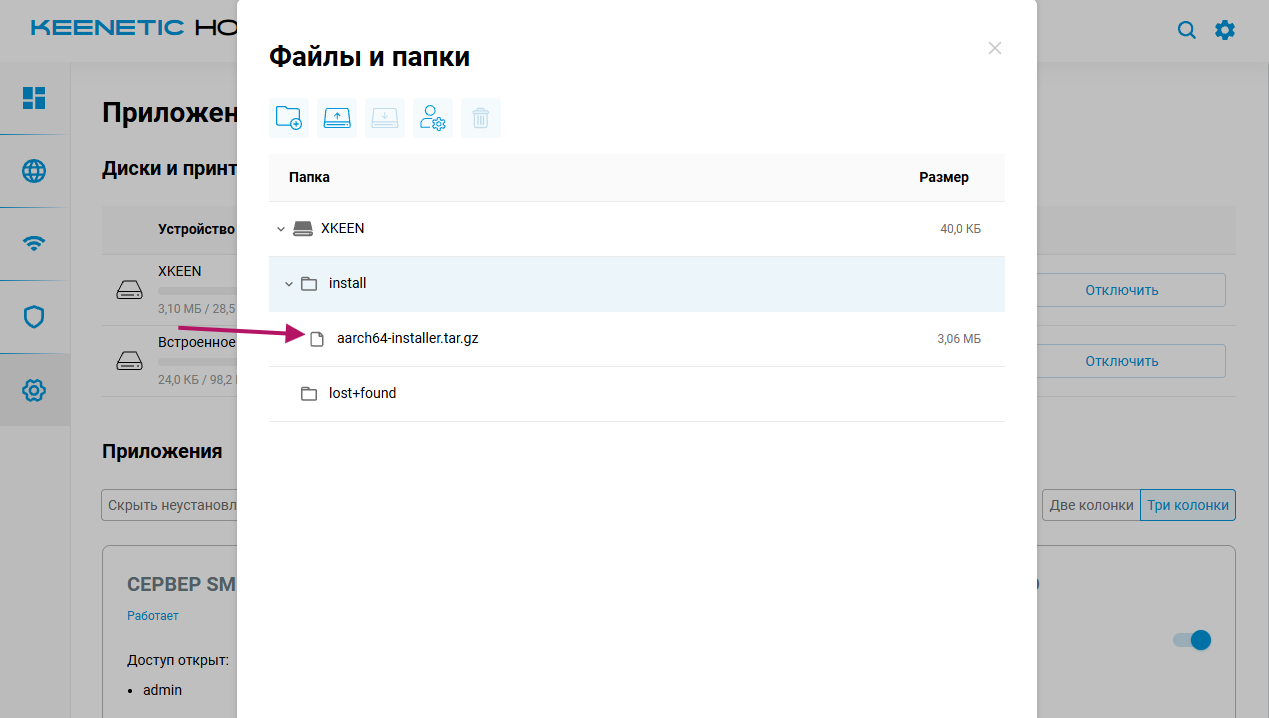
Download the archive matching your router and upload it to the install folder.
It should look like this:
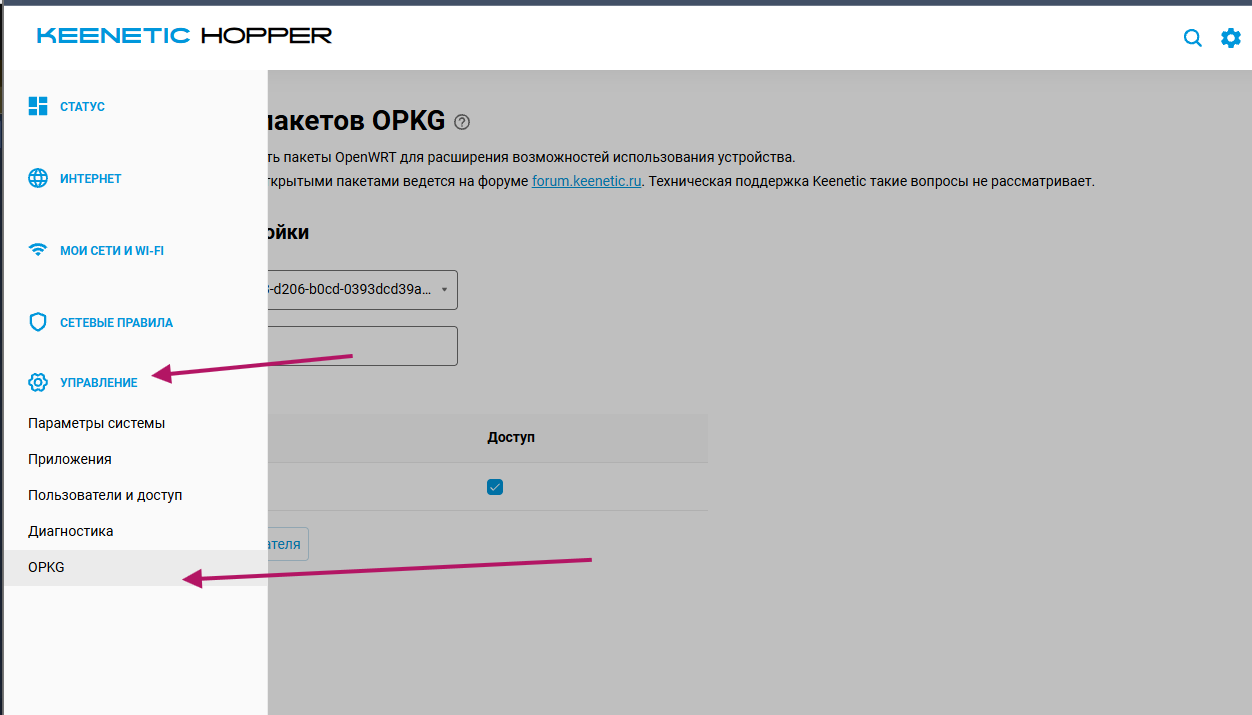
3.3. Start the OPKG installation
Go to the Management tab and click OPKG.
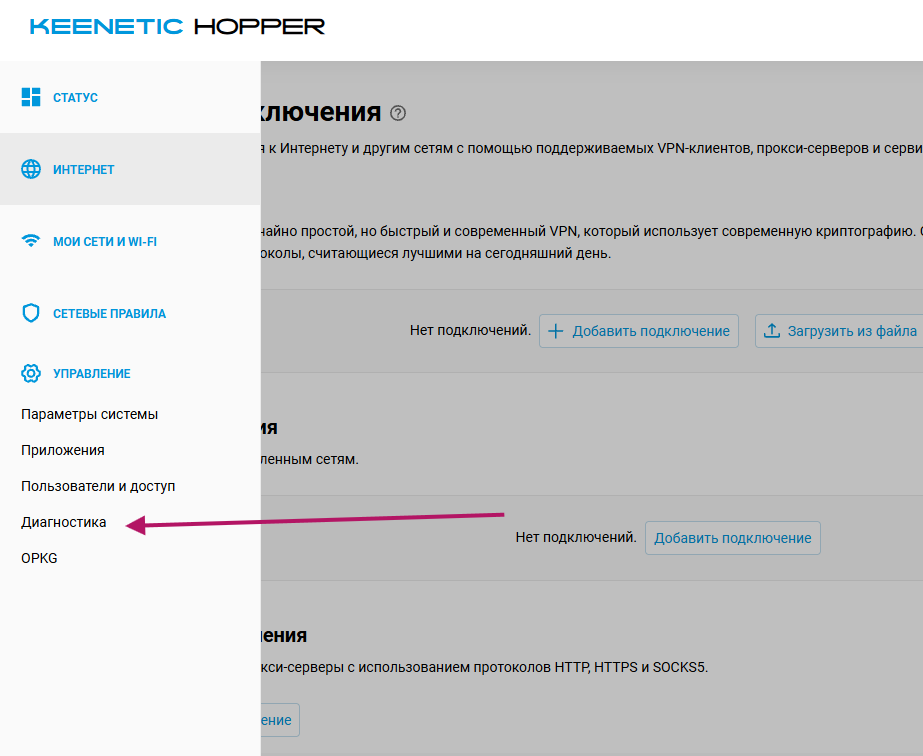
3.4. Check installation progress (optional)
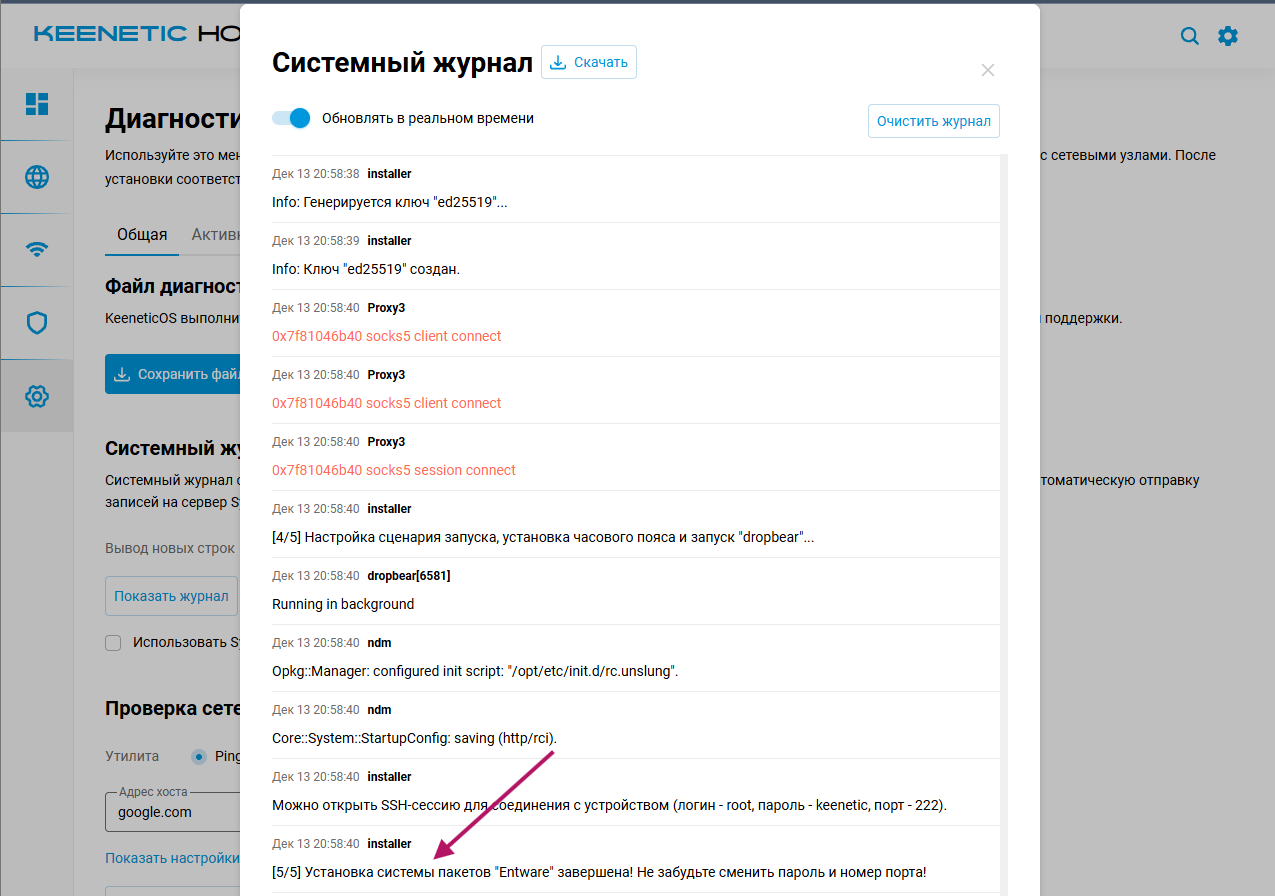
If you go to the Diagnostics tab, you can watch the entire package installation process.
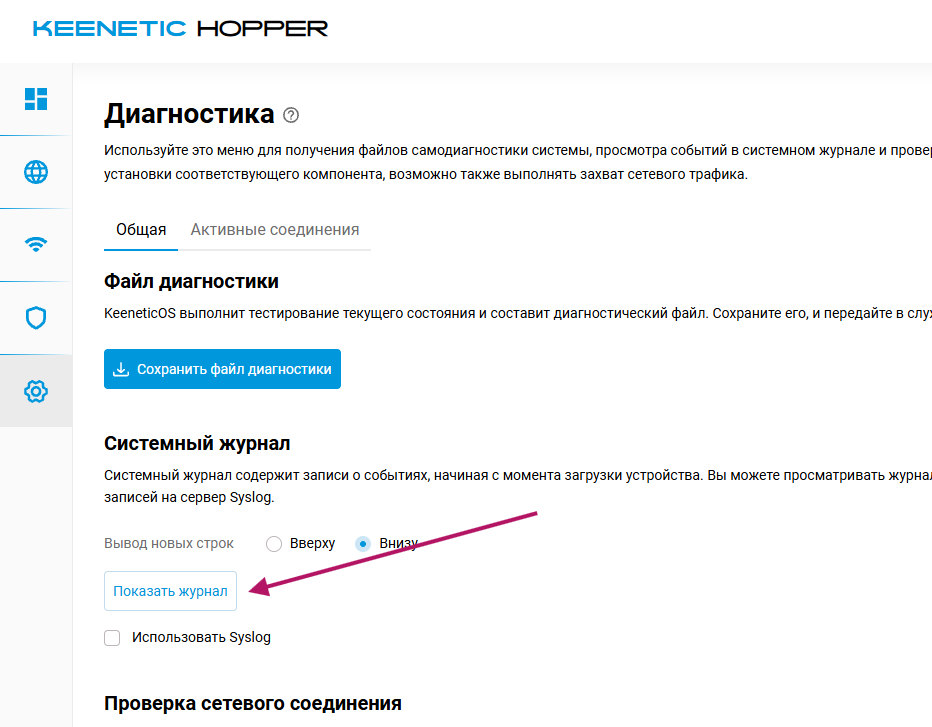
Wait until the router shows "5/5 installation complete".
4. Installing XKeen
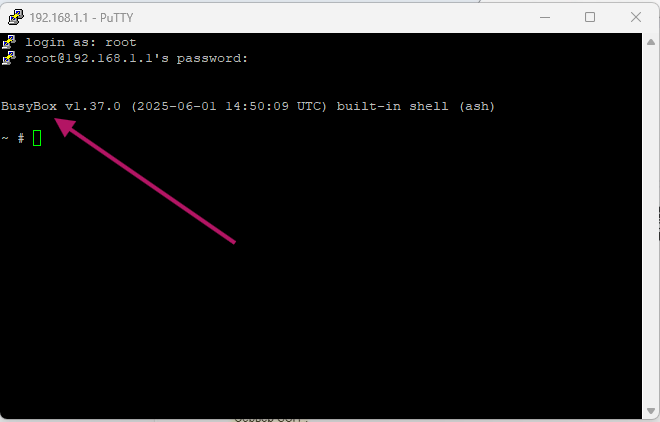
4.1. Connect to the router via SSH
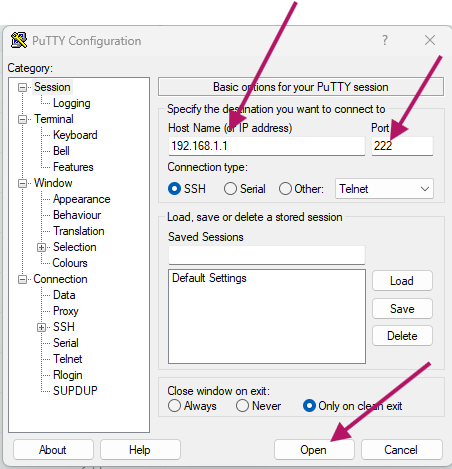
Use an SSH client (for example, PuTTY) with the following settings:
| Parameter | Value |
|---|---|
| Address | 192.168.1.1 |
| Port | 222 |
| Login | root |
| Password | keenetic |
4.2. Update packages
First, update the package list:
opkg update

Then upgrade installed packages and install dependencies:
opkg update && opkg upgrade && opkg install curl tar
4.3. Download and run the XKeen installer
Run the following commands:
curl -sOfL https://raw.githubusercontent.com/jameszeroX/XKeen/main/install.sh
chmod +x ./install.sh
./install.sh
4.4. Go through the menu installation
In the menu that appears, choose 1 — install.
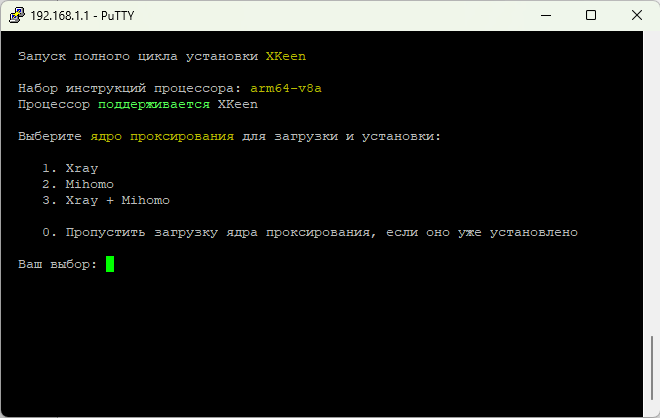
Choose the newest kernel (first in the list).
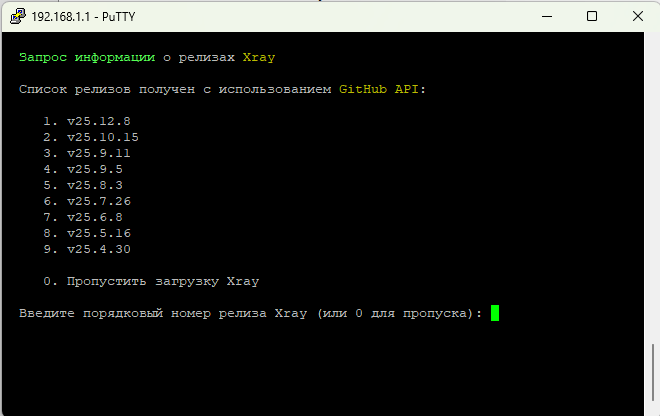
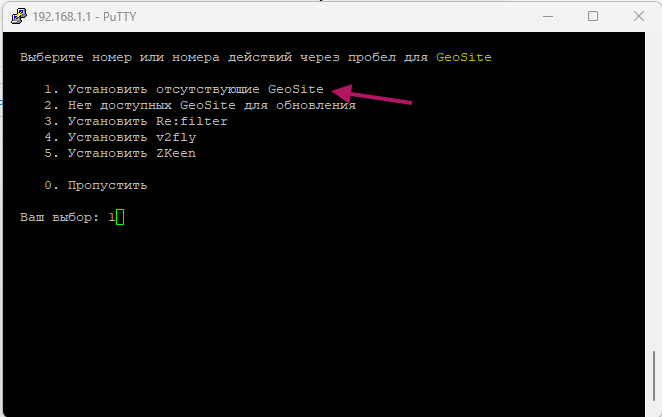
Choose install geosite.

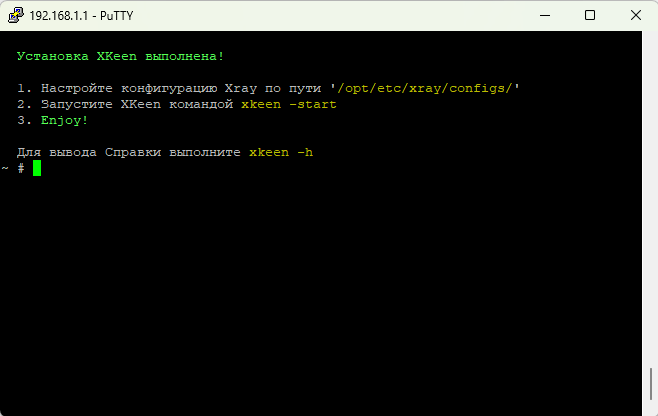
When installation finishes, you'll be prompted to configure the config.
5. Configuring XKeen
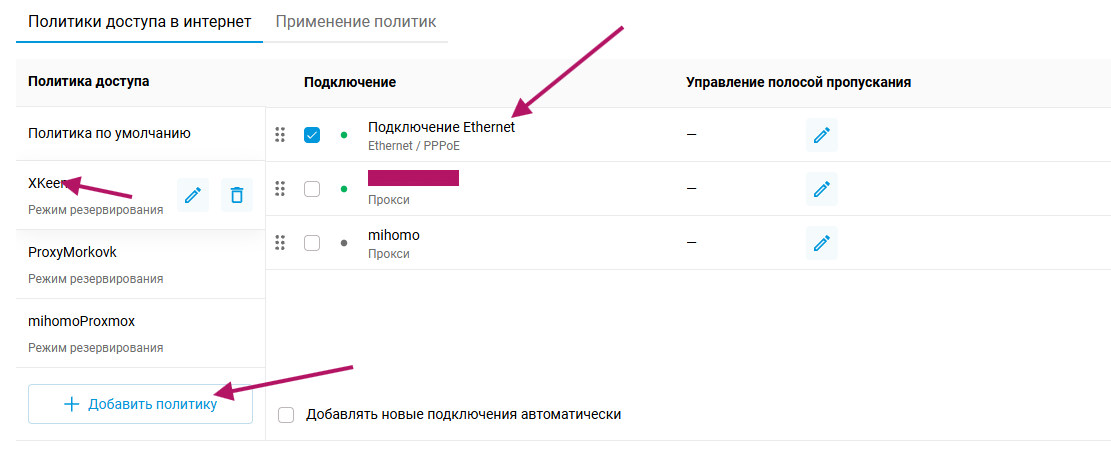
5.1. Add a routing policy
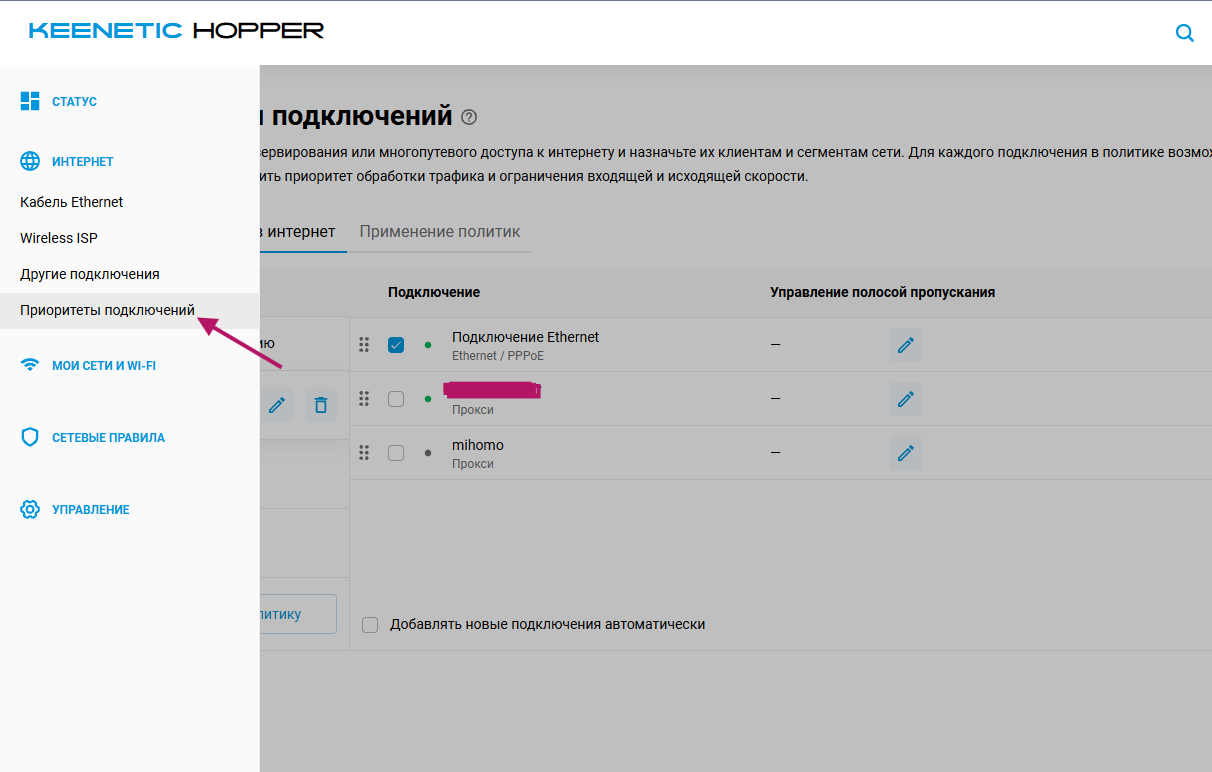
In the router's web interface, add a new routing policy.
5.2. Copy the configs
Open the router's network folder:
\\192.168.1.1\xkeen\etc\xray\configs
Copy 3 configs there:
5.3. Fill in 04_outbounds.json
The file structure looks like this:
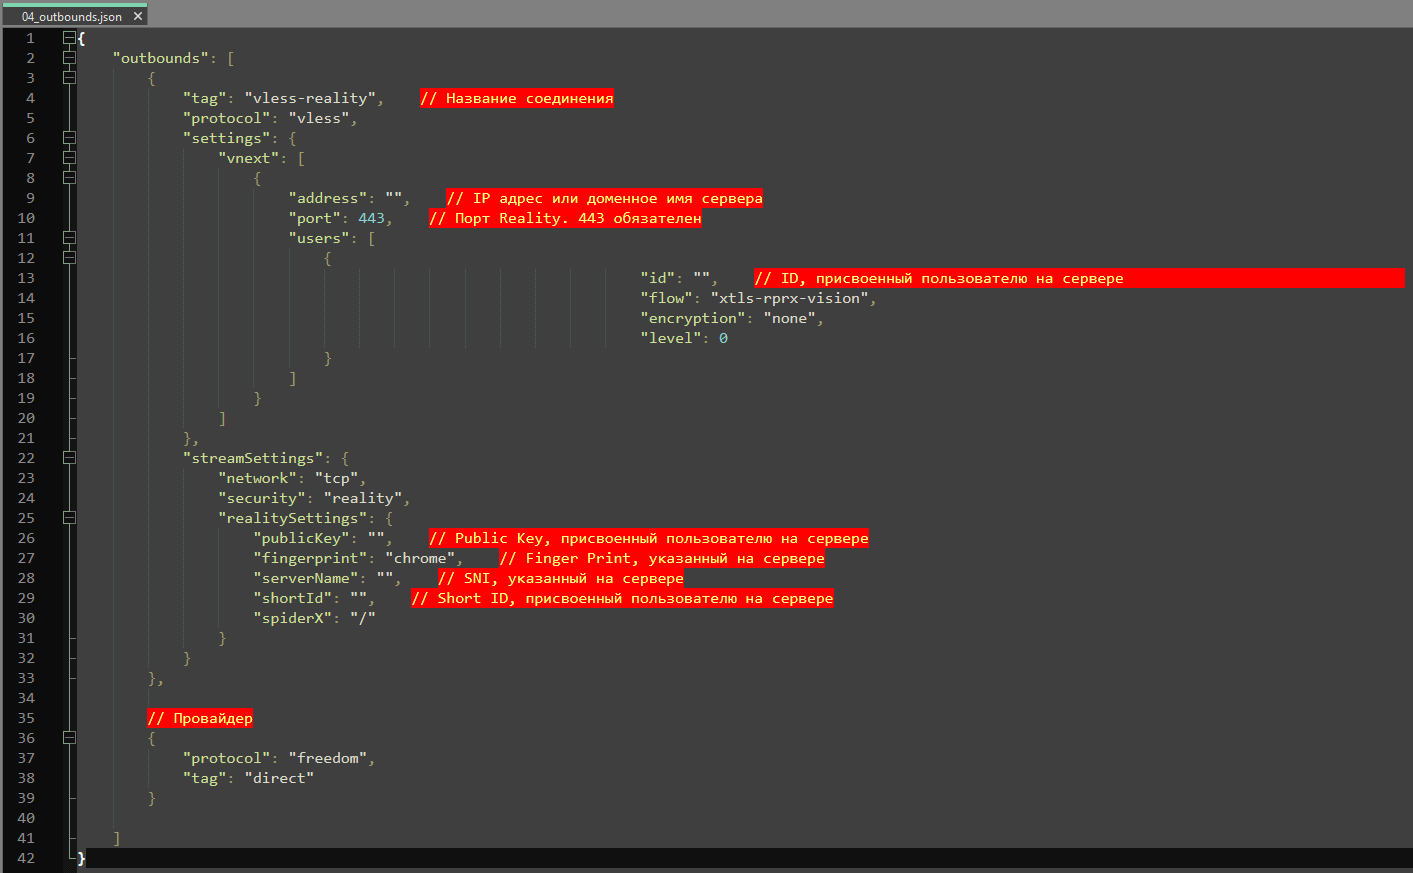
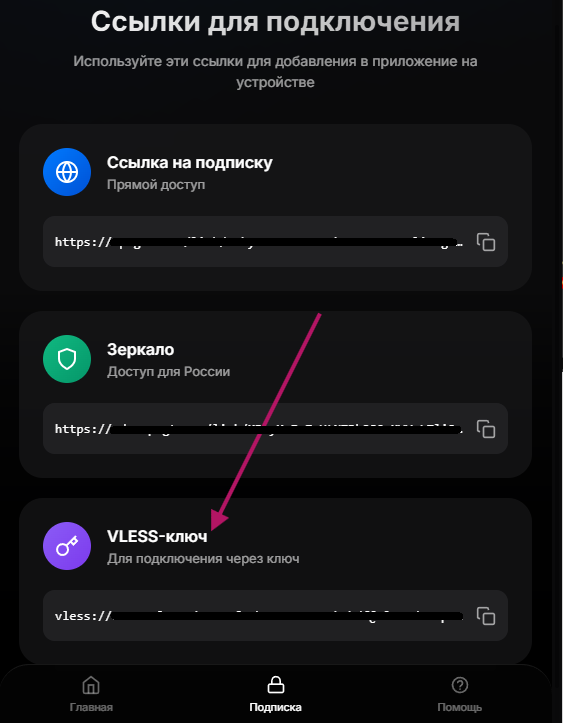
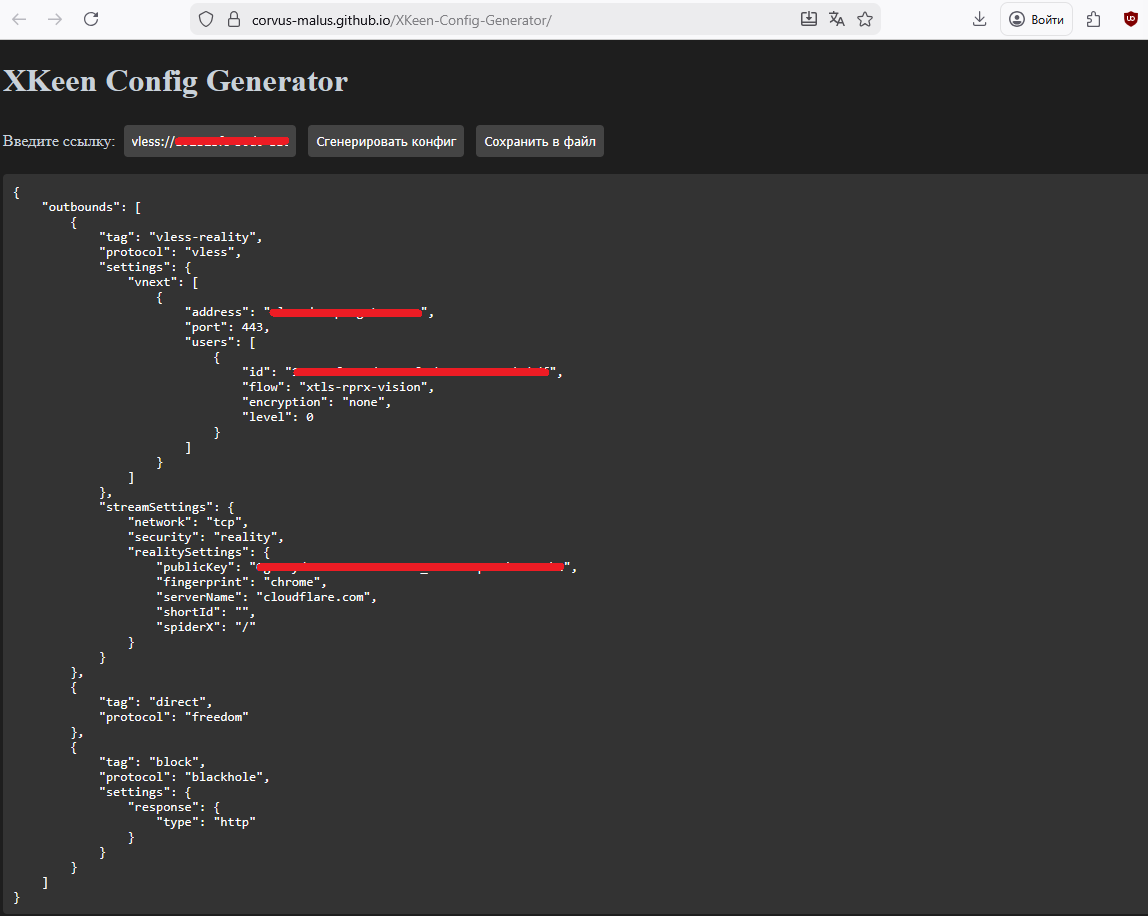
Fill it with data from your VLESS link. Open your account, copy the VLESS key, and paste it into the XKeen Config Generator.
Transfer the data from the generator into 04_outbounds.json.
5.4. Start XKeen
In the SSH console run:
xkeen -start

6. Verifying it works
6.1. Assign the policy to a client
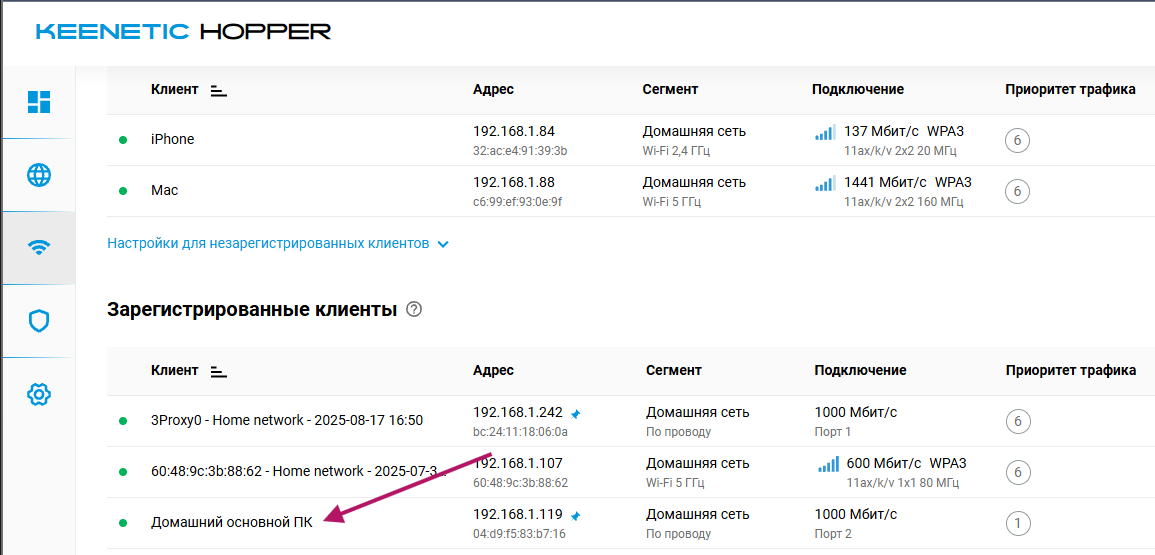
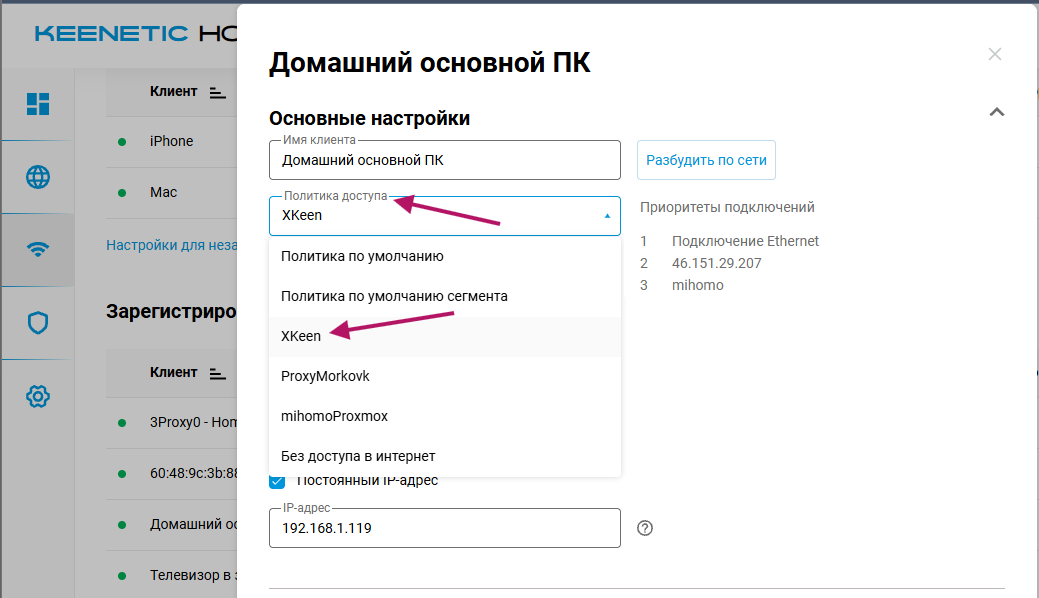
Go to the Client list.
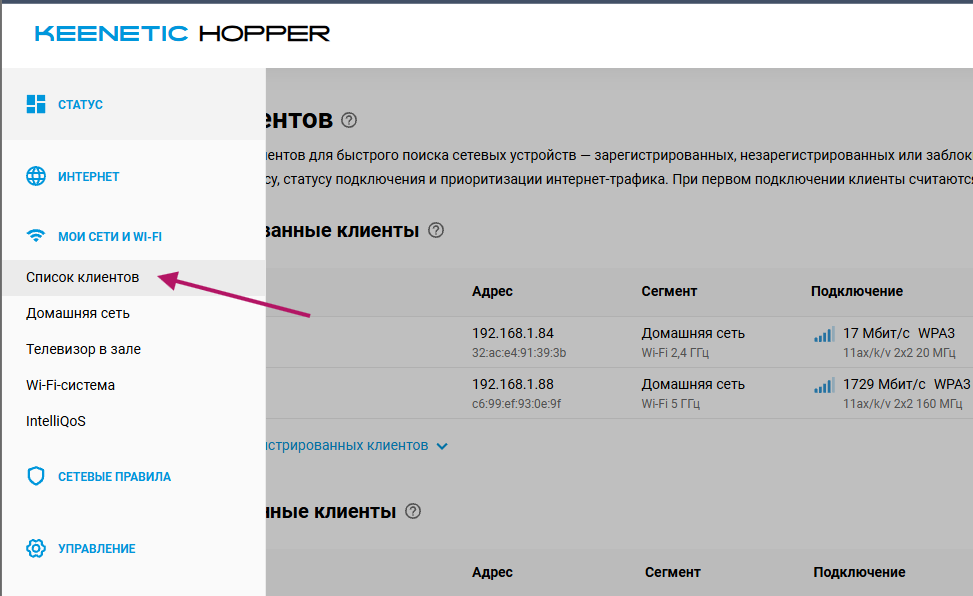
Choose the device on which you want to test the VPN, and assign it the routing policy you created.
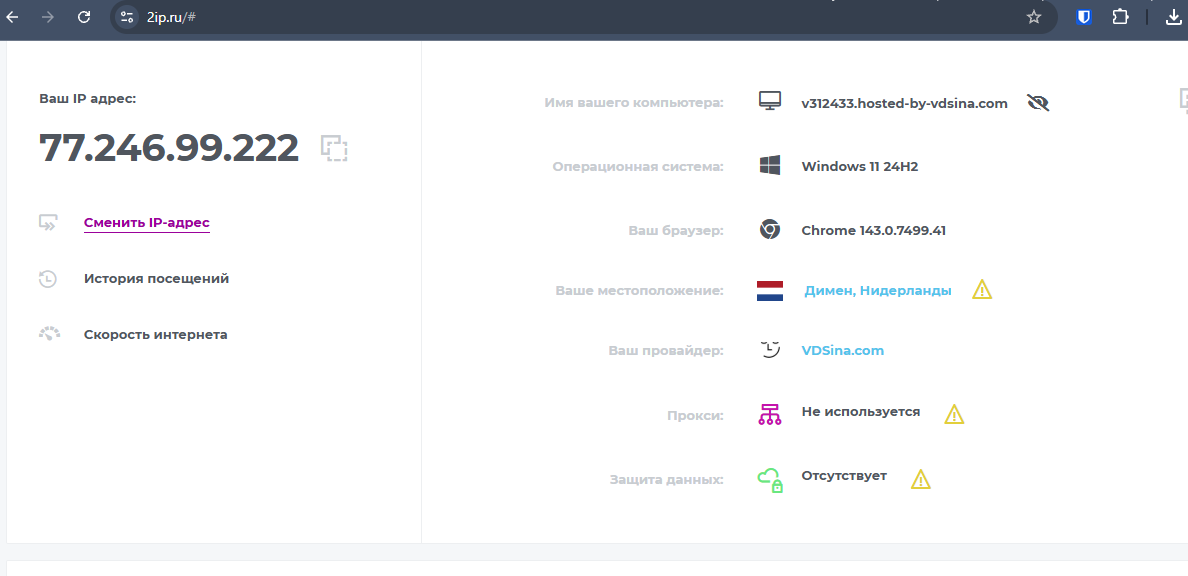
6.2. Check the connection
Open a browser on the chosen device and check that the VPN works.
Done! XKeen is installed and configured on your Keenetic router.