Installing Clash Verge on Windows
System requirements
- Windows 10/11 (64-bit)
- Administrator privileges
Step 1: Download the app
Alternative link
If the button above doesn't work, download from GitHub Releases
Step 2: Install the app
- Run the downloaded
Clash.Verge_2.4.0_x64-setup.exefile - Follow the installer instructions
- After installation, do not launch the app automatically
Step 3: Run as administrator
Important
Clash Verge requires administrator privileges for TUN mode to work
- Find the Clash Verge shortcut on your desktop or in the Start menu
- Right-click the shortcut
- Select "Run as administrator"
- Confirm the UAC prompt
Step 4: Get the subscription link
In your account
- Open your account in the bot or on our website
- Find the "Subscription" section
- Copy your link
Step 5: Import the profile
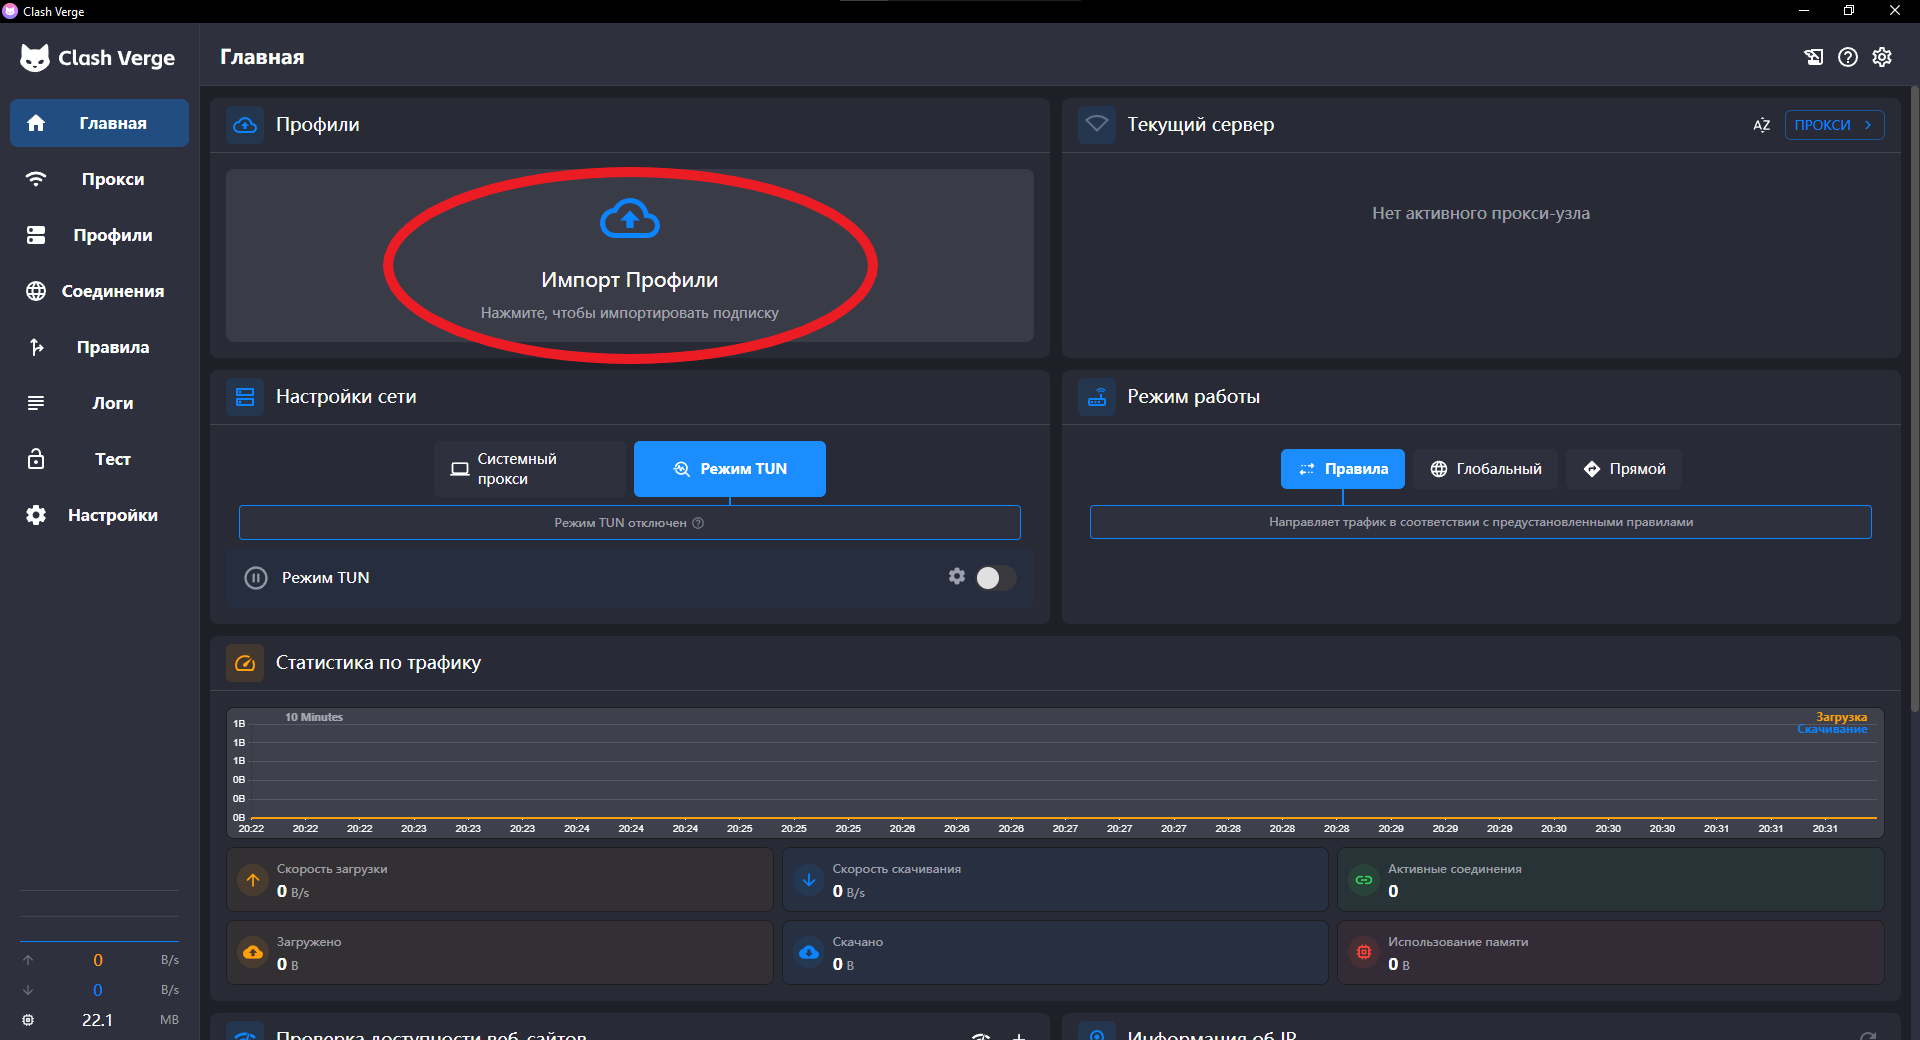
1
In the Clash Verge main window, click "Import profile"
2
In the window that opens, paste the copied link
3
Click the "Import" button
3
Wait for the profile to load and return to the main screen
Step 6: Install TUN services
On first launch, you need to install the services:
- Find the "TUN Mode" toggle
- Click the settings icon ⚙️ next to the toggle
- Click "Install Service"
- Confirm the installation
Activate the connection
- Select "TUN" mode in the dropdown menu
- Turn on the "TUN Mode" toggle
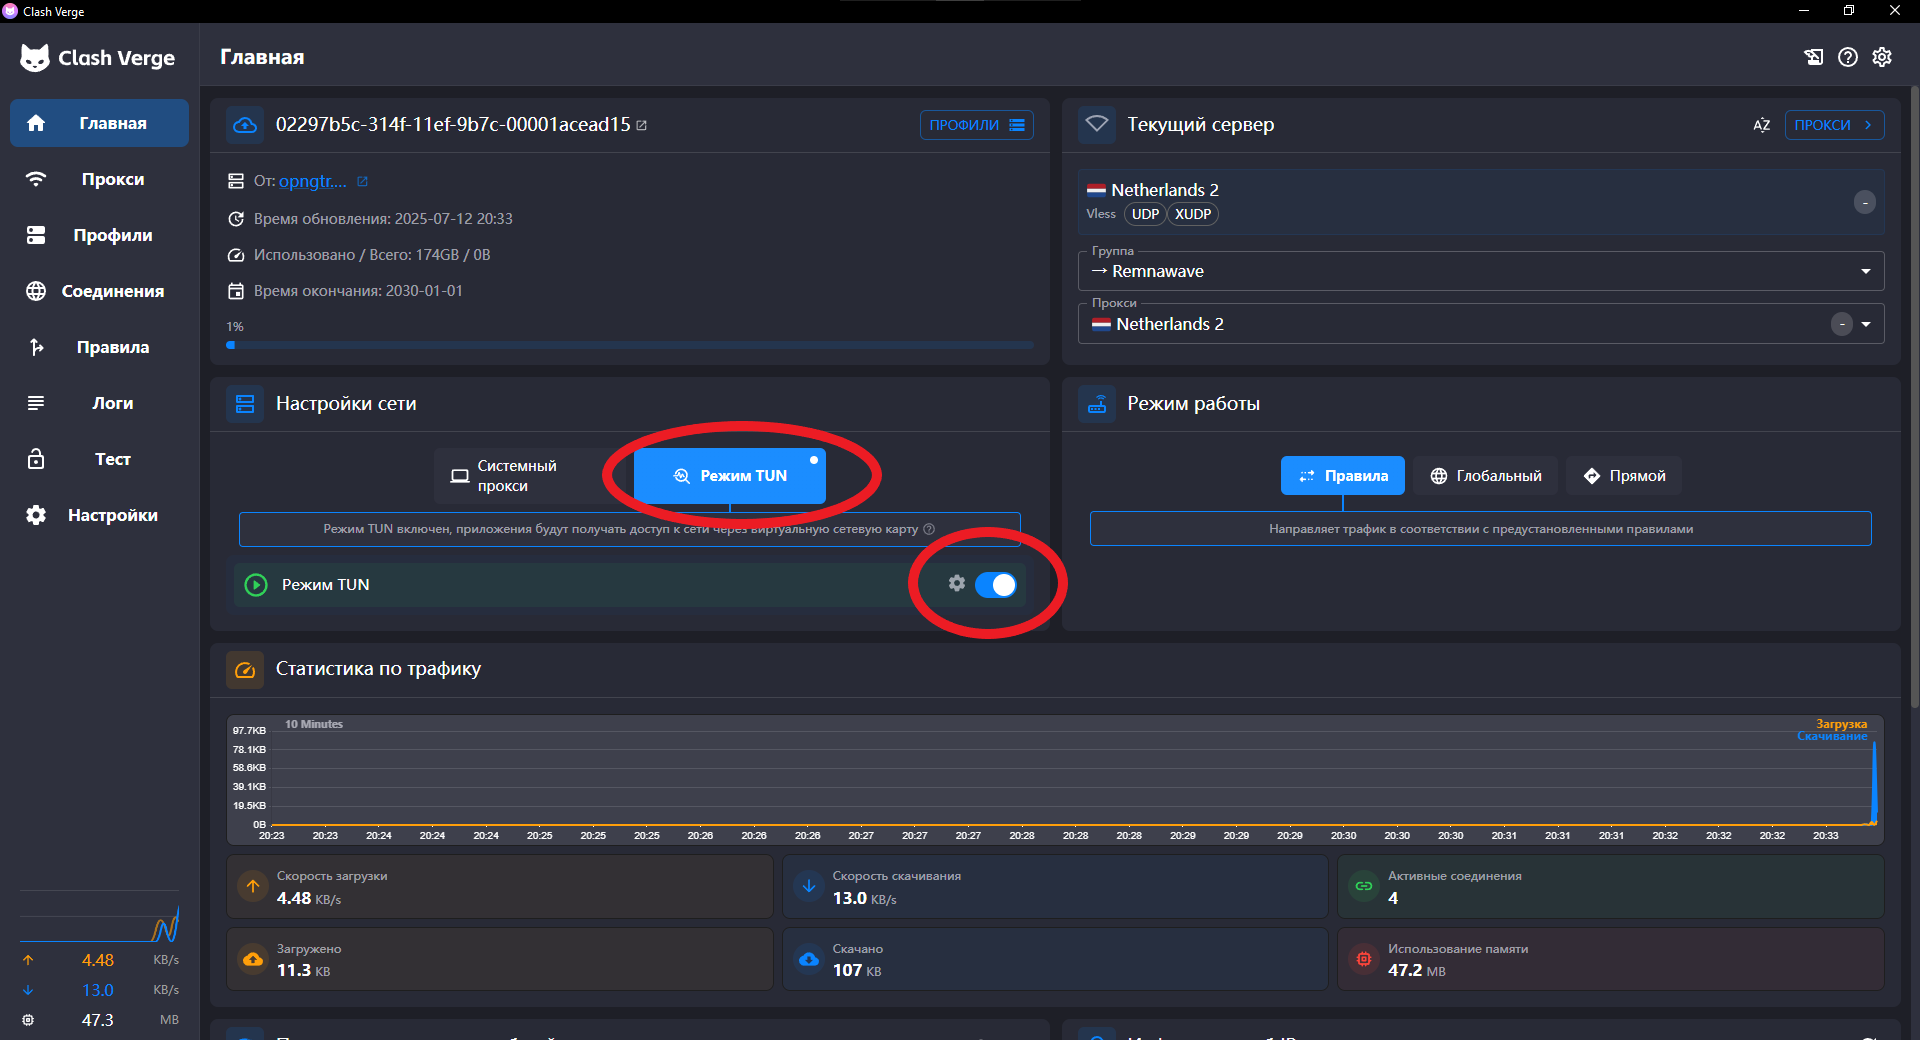
Done!
Once TUN mode is enabled, all traffic will go through Clash
Connection management
- Enable: Turn on the TUN Mode toggle
- Disable: Turn off the TUN Mode toggle
- Switch server: Open the Proxies tab and select another server
Additional settings
Setting up exceptions
Some apps may require a direct connection:
- Open Settings → System Proxy
- In the "Bypass" field, add domains separated by commas: localhost,127.0.0.1,*.local