How to install and set up Karing on iOS?
Download links
Installation methods
- Manual
- Automatic
Manual installation
Download the Karing app from the App Store
Install the app and open it.
Accept the terms of use
On first launch, tap "Accept & Continue"
Skip the initial setup
Karing will offer to choose a language, country, and rule templates. On each of these screens just tap "Next" — you don't need to choose anything except the language.
Finish the setup
On the "Settings" screen, leave "Novice mode" enabled and tap "Done"
In your account
- Open your account in the bot or on the website
- Tap the "Subscription" section
- Copy your link
Import the subscription
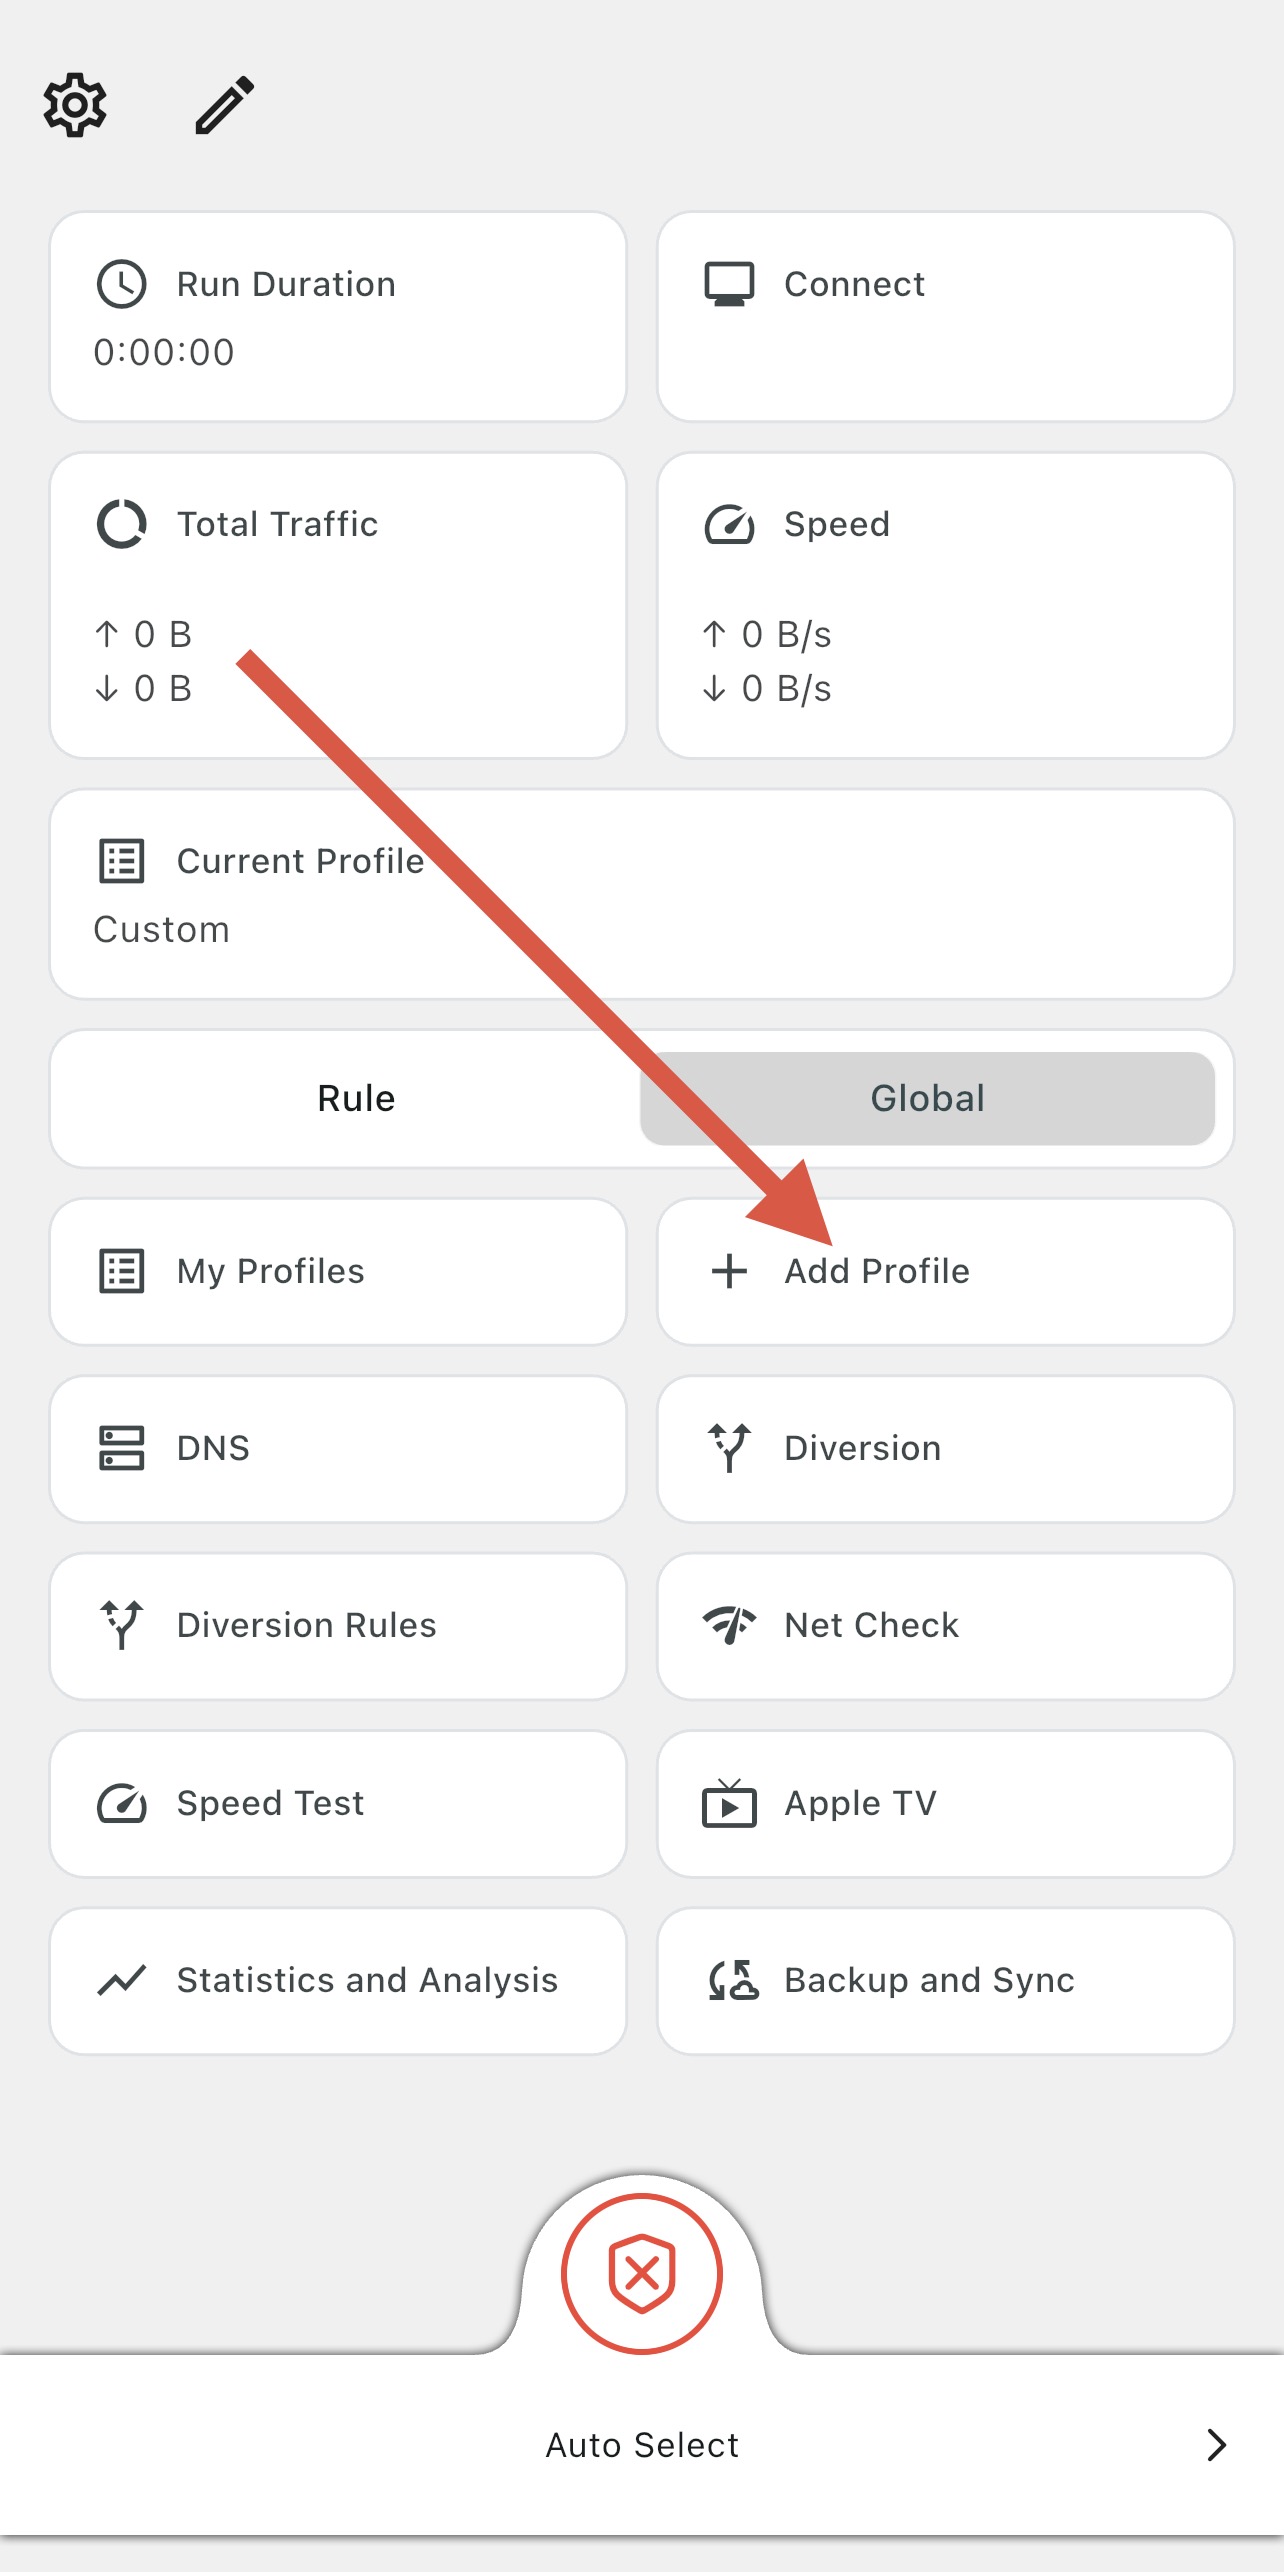
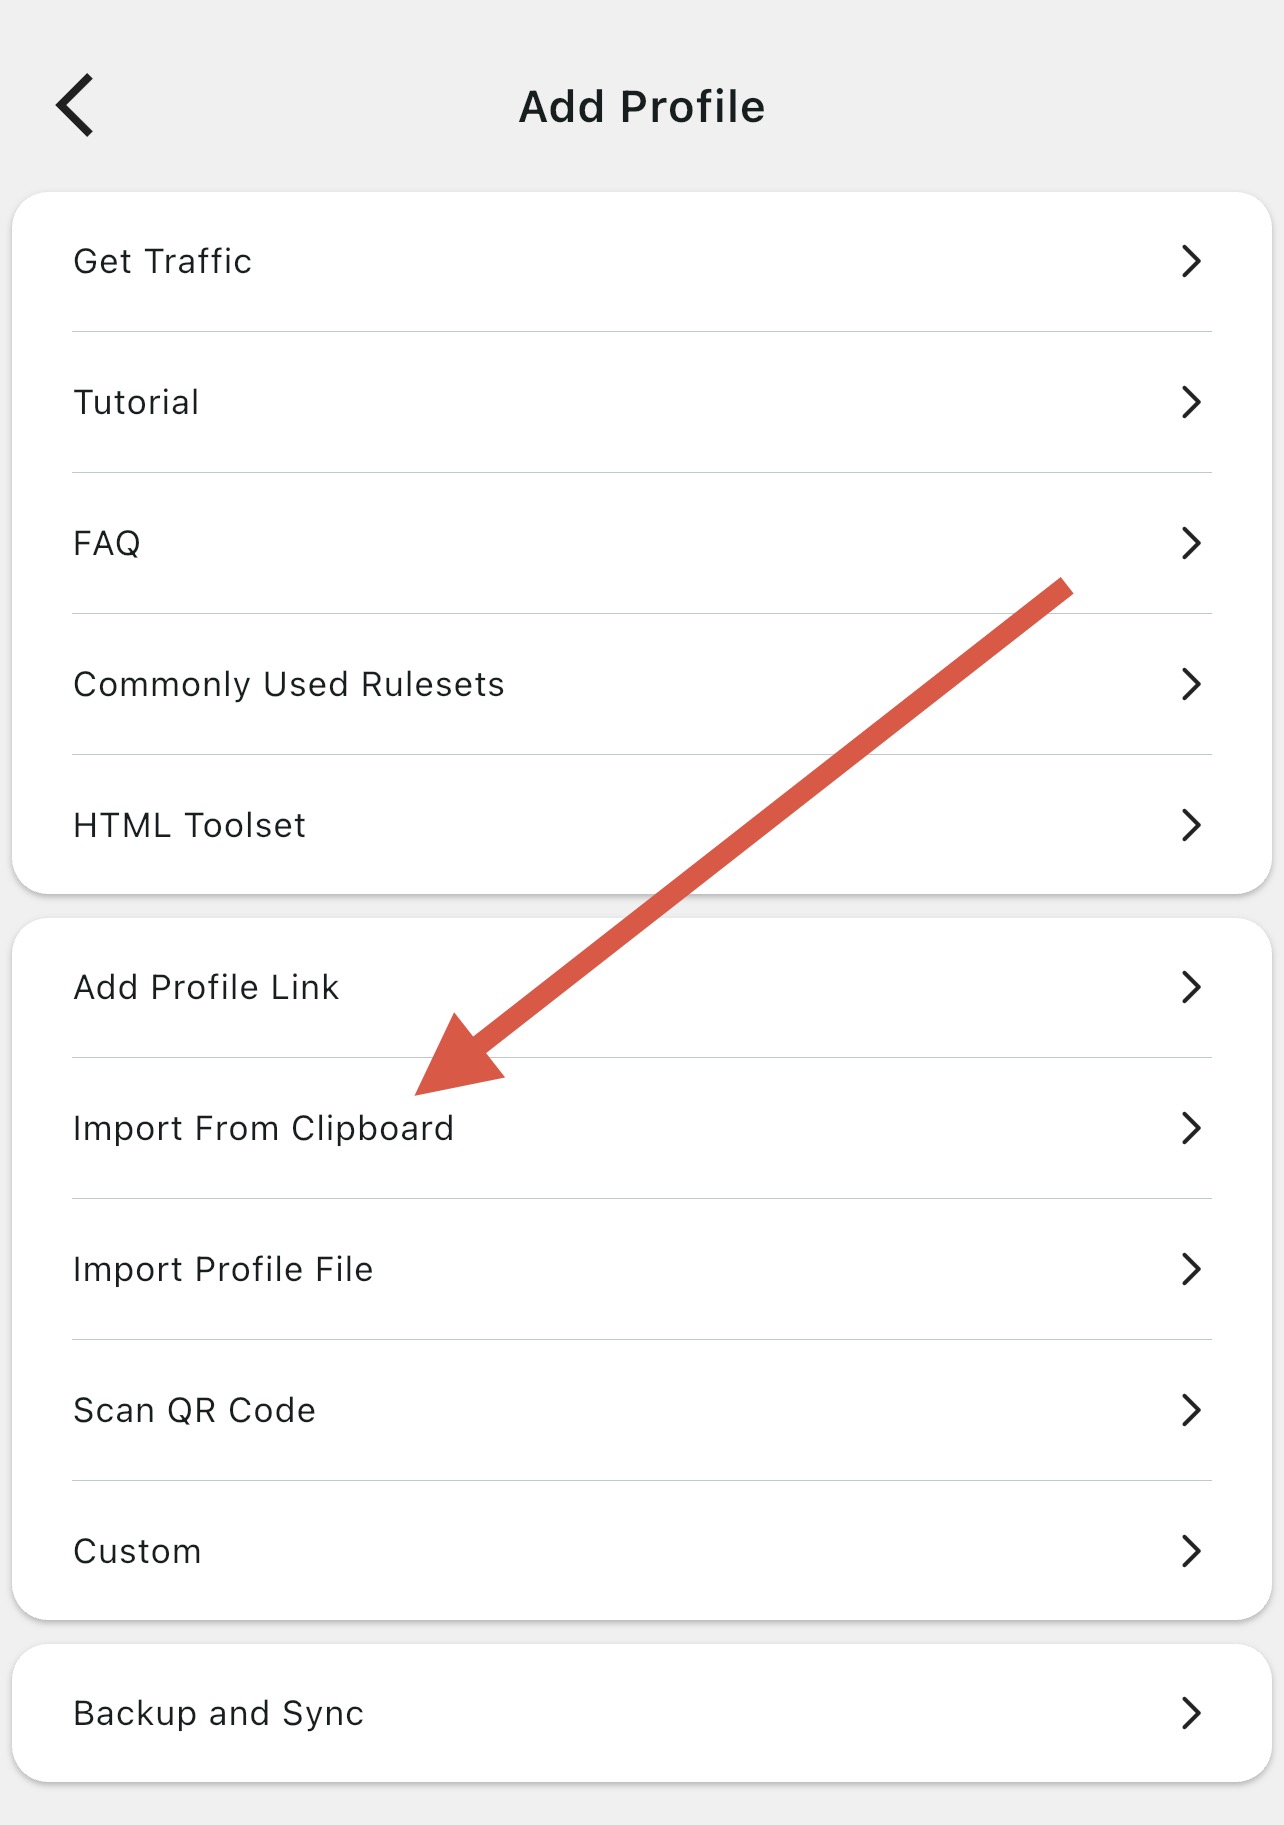
In Karing tap "Add profile" → "Import from clipboard"
Allow paste
iOS will ask for permission to paste from clipboard — tap "Allow Paste"
Confirm the addition
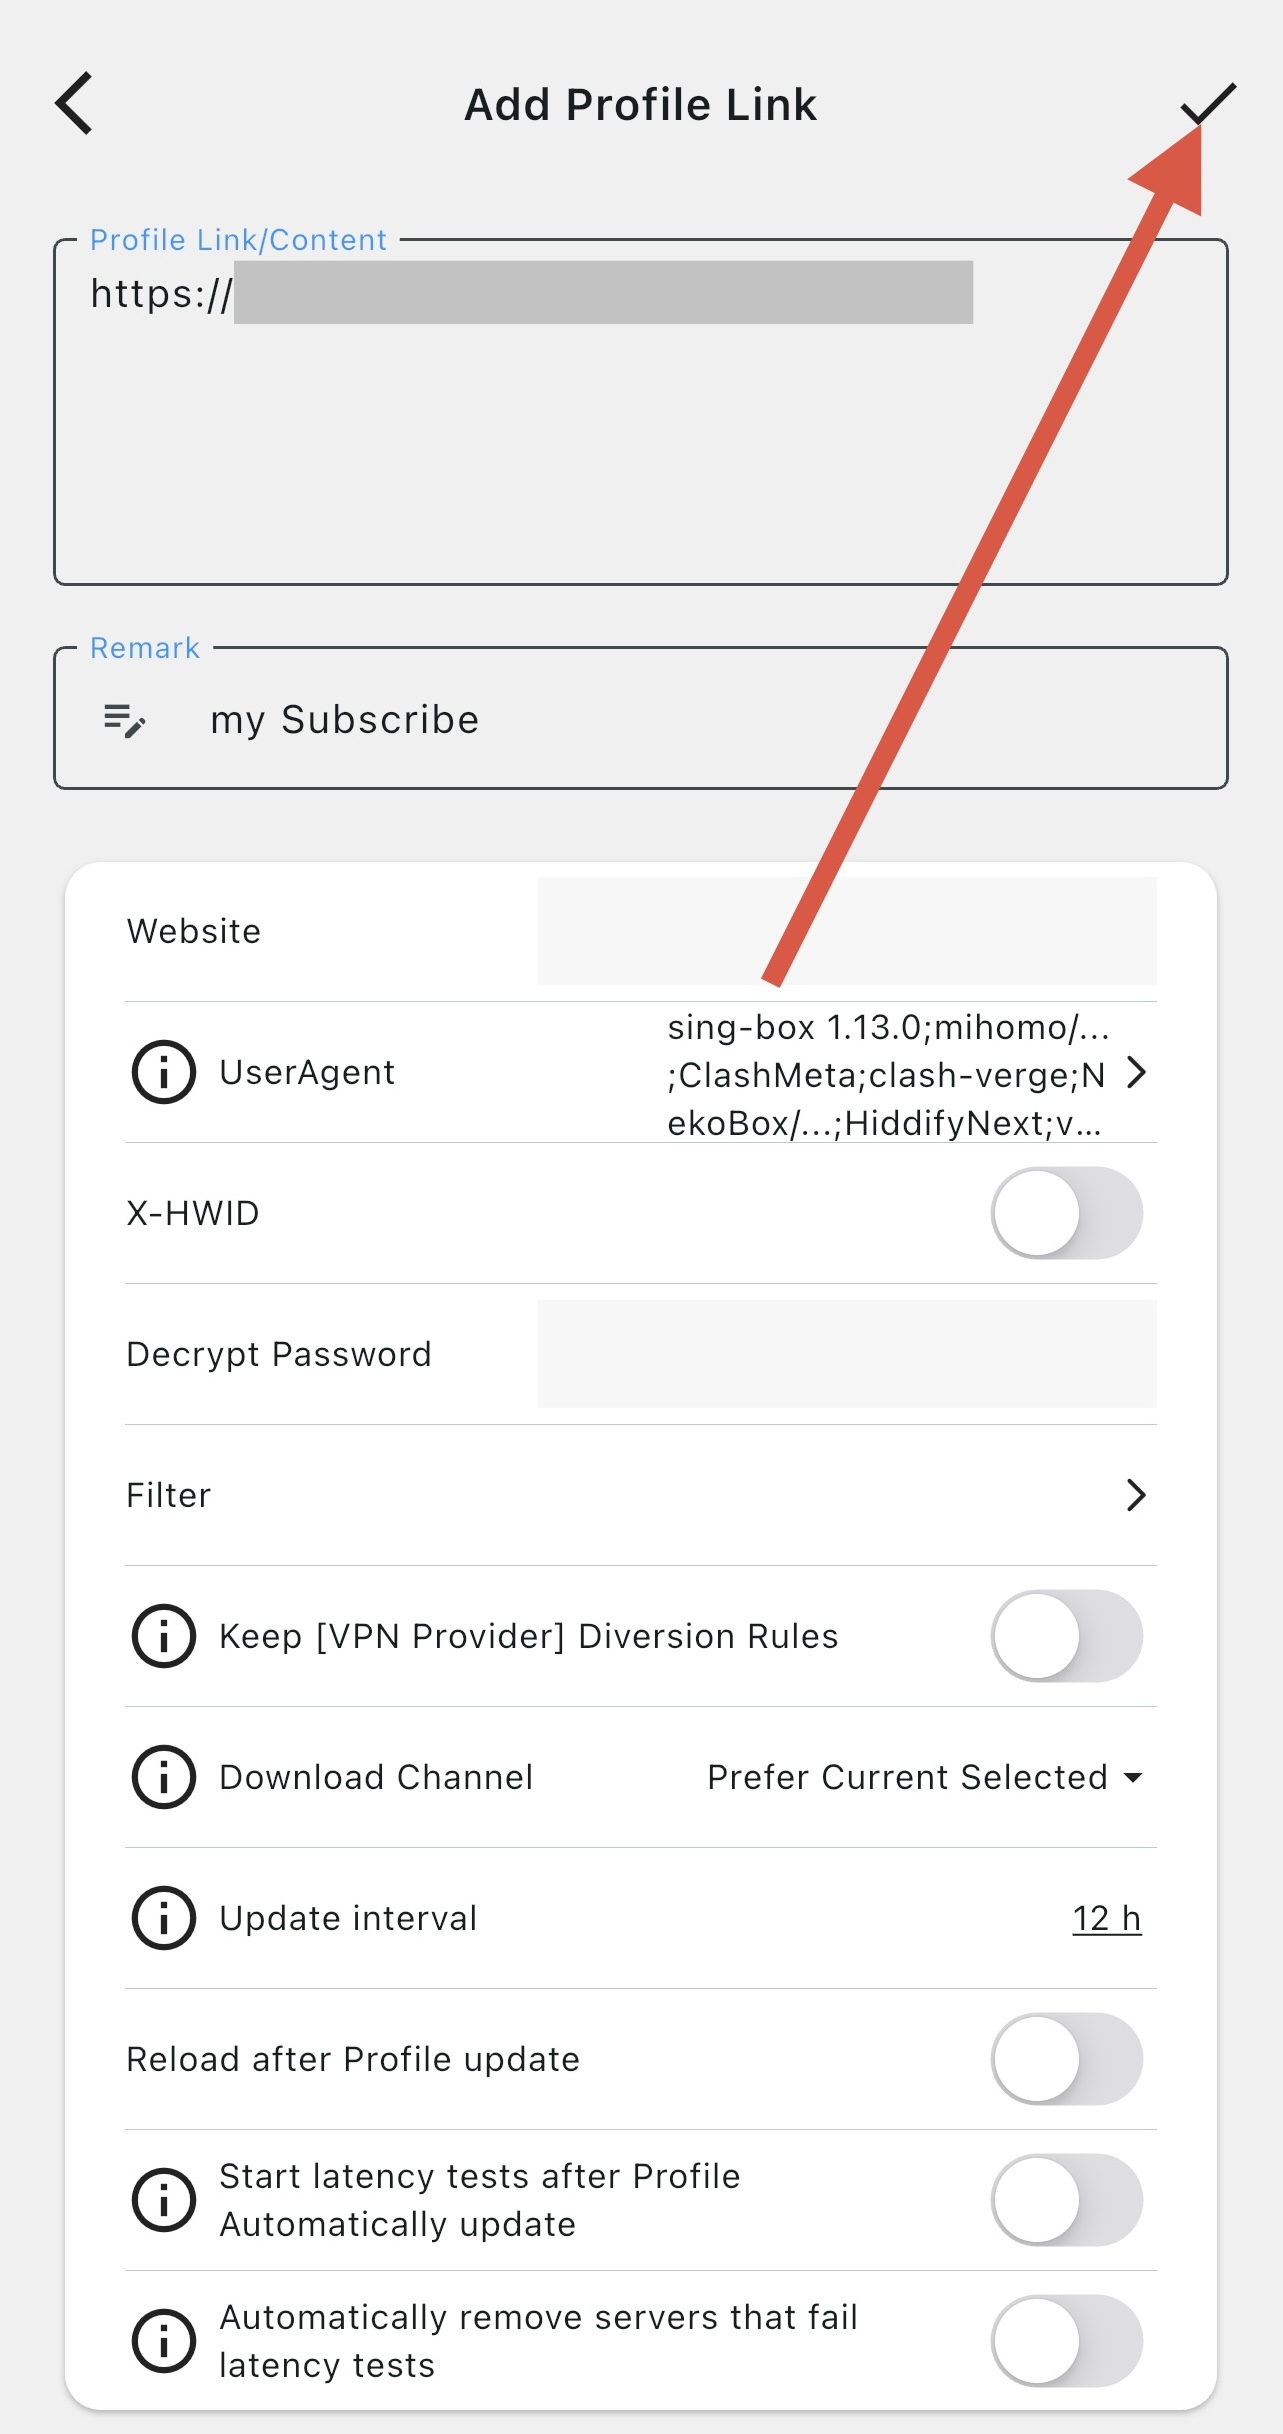
The subscription link will be pasted automatically. Tap the checkmark ✓ in the top right corner to confirm.
Allow the proxy
On first connect, iOS will ask for permission to add a Proxy configuration — tap "Allow"
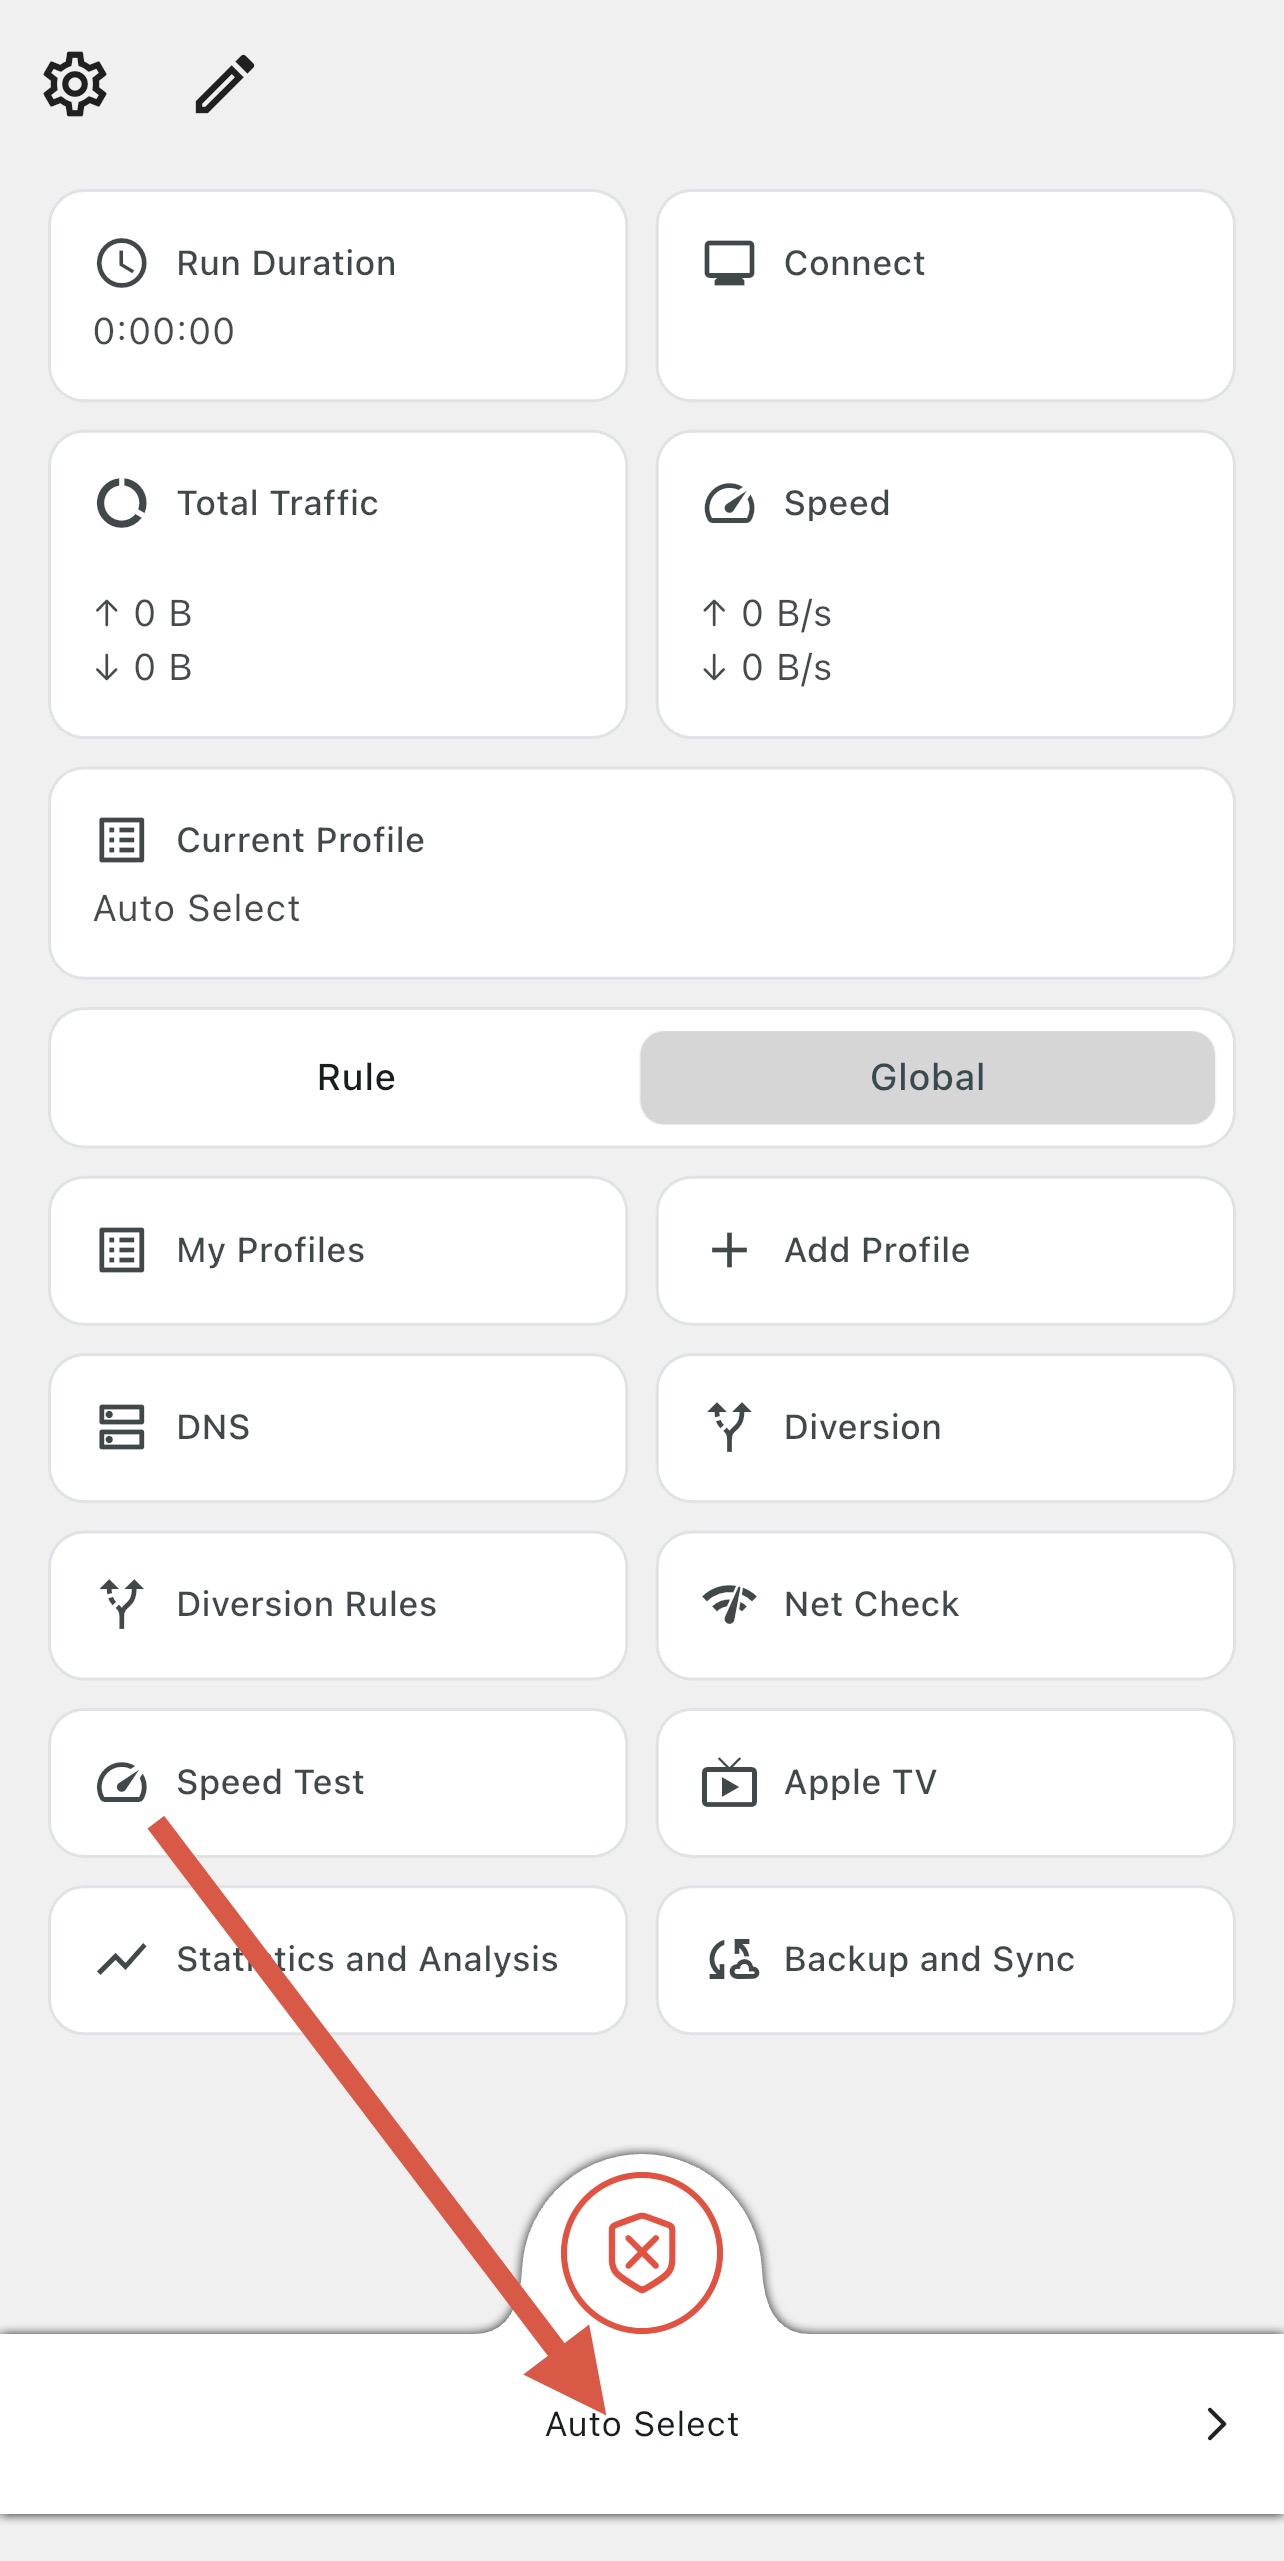
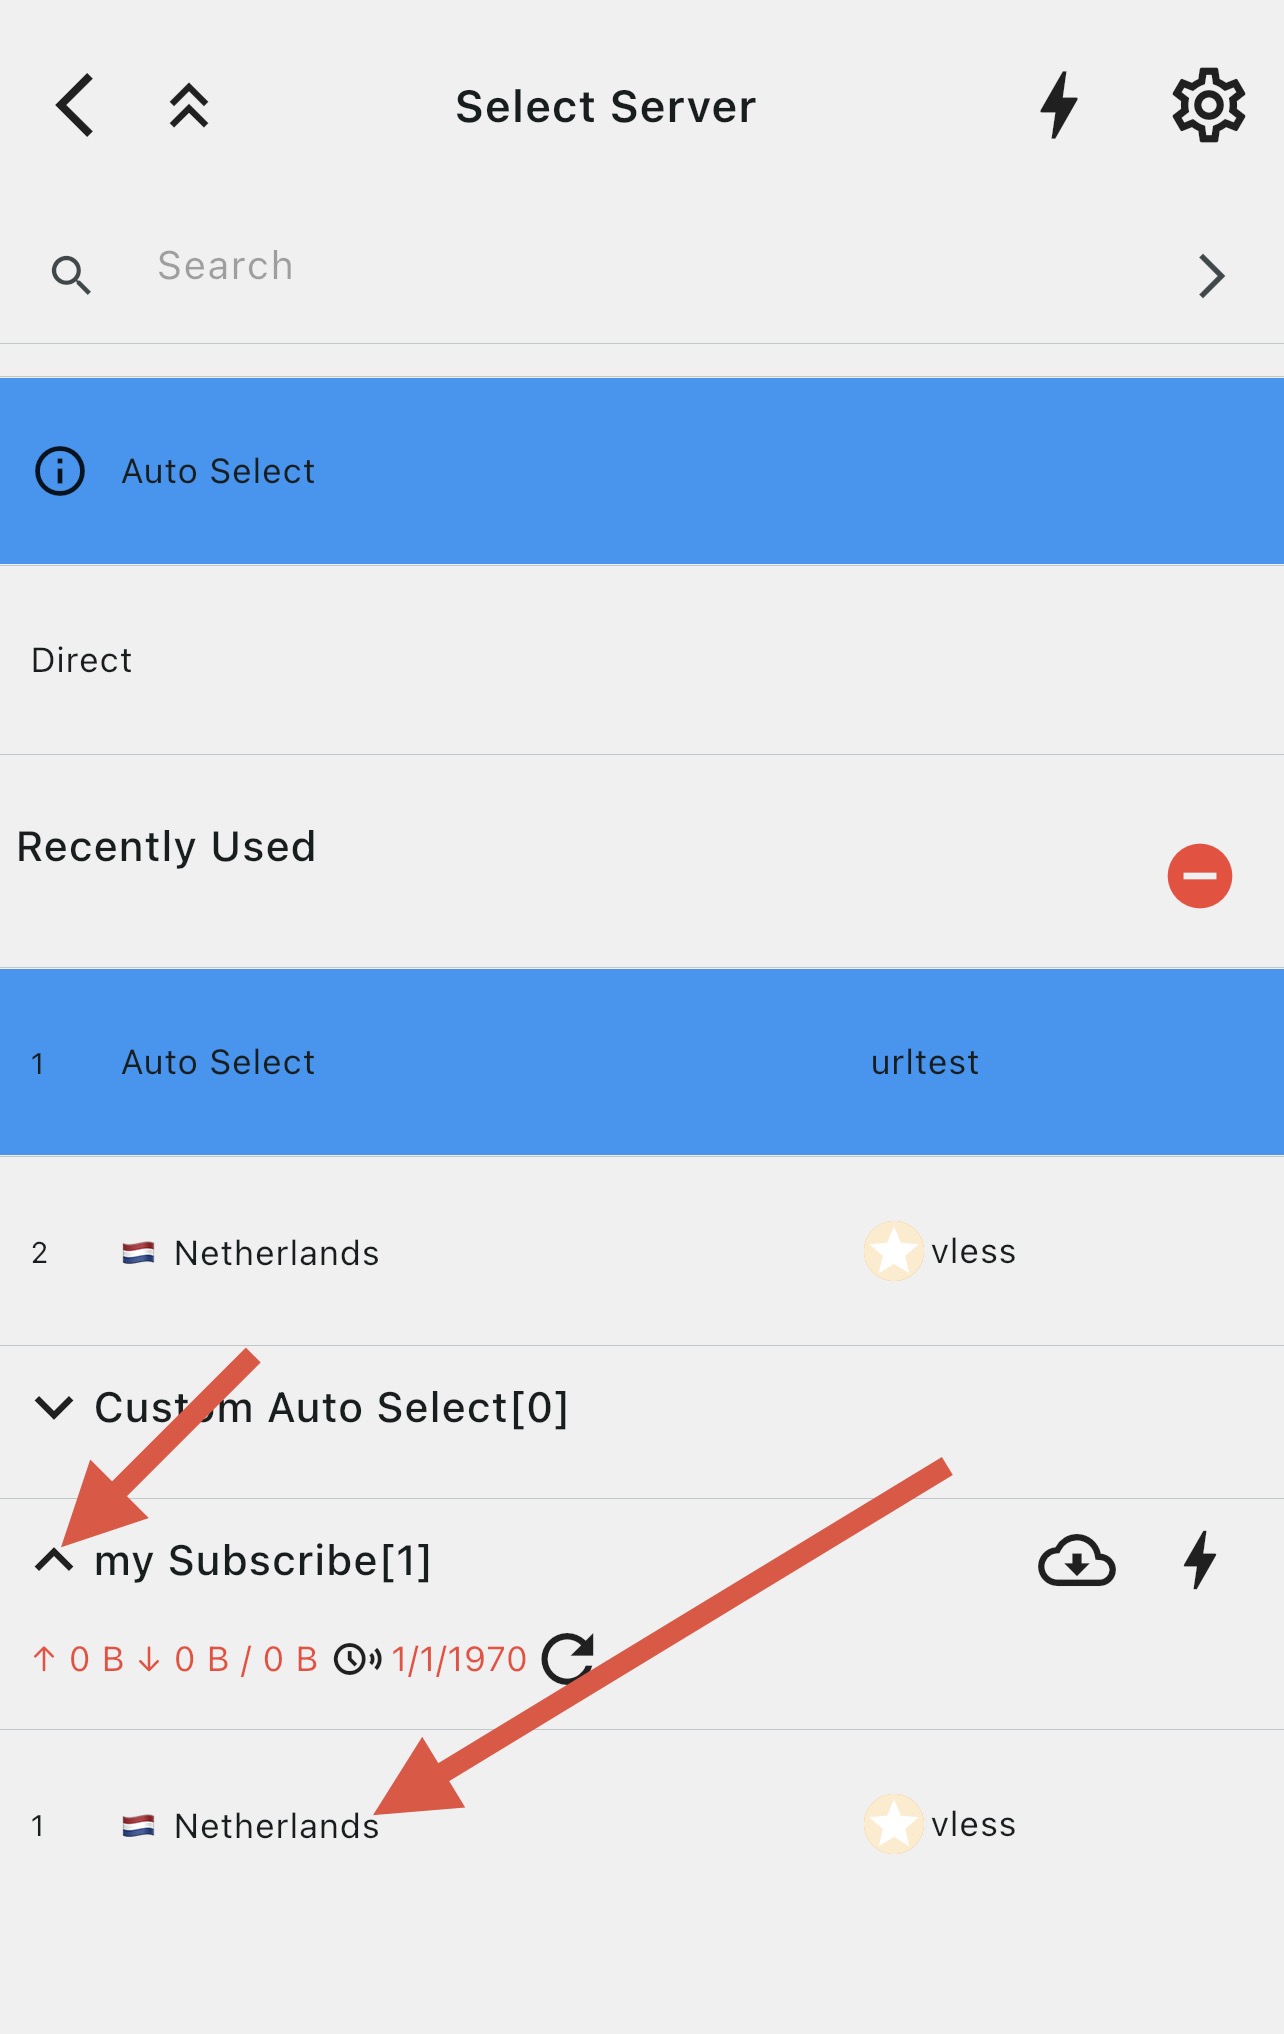
Choose a server
Tap "Auto-select" at the bottom of the screen to open the server list, and choose the desired location.
Done!
The connection is established. The green checkmark on the main screen means the proxy is working.
Note!
Karing does not support XHTTP servers.
Automatic installation
Open your account
Open your account in the bot or on the website and go to the "Installation and setup" section
Select iOS and Karing
Select your operating system, then select the Karing app
Install and add the subscription
Tap "Download", then once installed tap "Add subscription" in your account, then confirm adding the subscription in Karing
Done!
Start the connection and confirm adding the proxy profile to your device